Peel-and-Stick Tile: Is It Actually Worth It? Pros, Cons & Where to Use It
Peel-and-stick tile has an obvious appeal. You can change the look of a kitchen backsplash, bathroom wall or tired floor without mixing mortar, spreading adhesive or committing to a full renovation. In the right setting, it can be one of the easiest ways to make a room feel finished for relatively little money.
The problem is that peel-and-stick tile gets marketed as though it can replace traditional tile almost anywhere.
It cannot.
The material itself is rarely the deciding factor. What matters more is the surface underneath it, how much heat or moisture the area sees, how carefully it is installed and what you expect the finished project to look like a few years from now.
Used in the right place, peel-and-stick tile can be surprisingly good. Used in the wrong place, it can start lifting at the corners, reveal every imperfection underneath or turn a quick weekend project into a frustrating redo.
So is peel-and-stick tile worth it? For some projects, absolutely. For others, I would spend the extra time and use a more permanent material.
First, Not All Peel-and-Stick Tile Is the Same
One reason opinions about peel-and-stick tile vary so much is that people may be talking about completely different products.
Some backsplash products are thin vinyl sheets printed to resemble subway tile, stone or mosaic. Others have a thicker gel-like face that creates more depth and a more convincing tile appearance. There are also individual peel-and-stick wall tiles made from vinyl, metal, glass or thin stone.
Peel-and-stick floor tile is another category altogether. Most versions are vinyl-based squares or planks with pressure-sensitive adhesive already applied to the back.
That means a homeowner who installed inexpensive vinyl squares on a laundry-room floor may have a very different experience from someone installing a thick dimensional backsplash product over smooth painted drywall.
Quality matters here more than most people realize.
Cheap peel-and-stick tile can look flat, repeat the same printed pattern too often or have weak adhesive. Better products tend to have cleaner edges, stronger backing, more convincing texture and less obvious repetition.
If you are still comparing flooring materials more broadly, Builzee’s Flooring Types & Materials guide is useful for understanding how vinyl, laminate, hardwood, tile and other flooring systems differ before you decide whether a temporary or permanent product makes sense.
Where Peel-and-Stick Tile Actually Works Well
The best applications are usually dry, stable areas where the tile is being used mostly as a finish rather than as part of a waterproof or highly durable assembly.
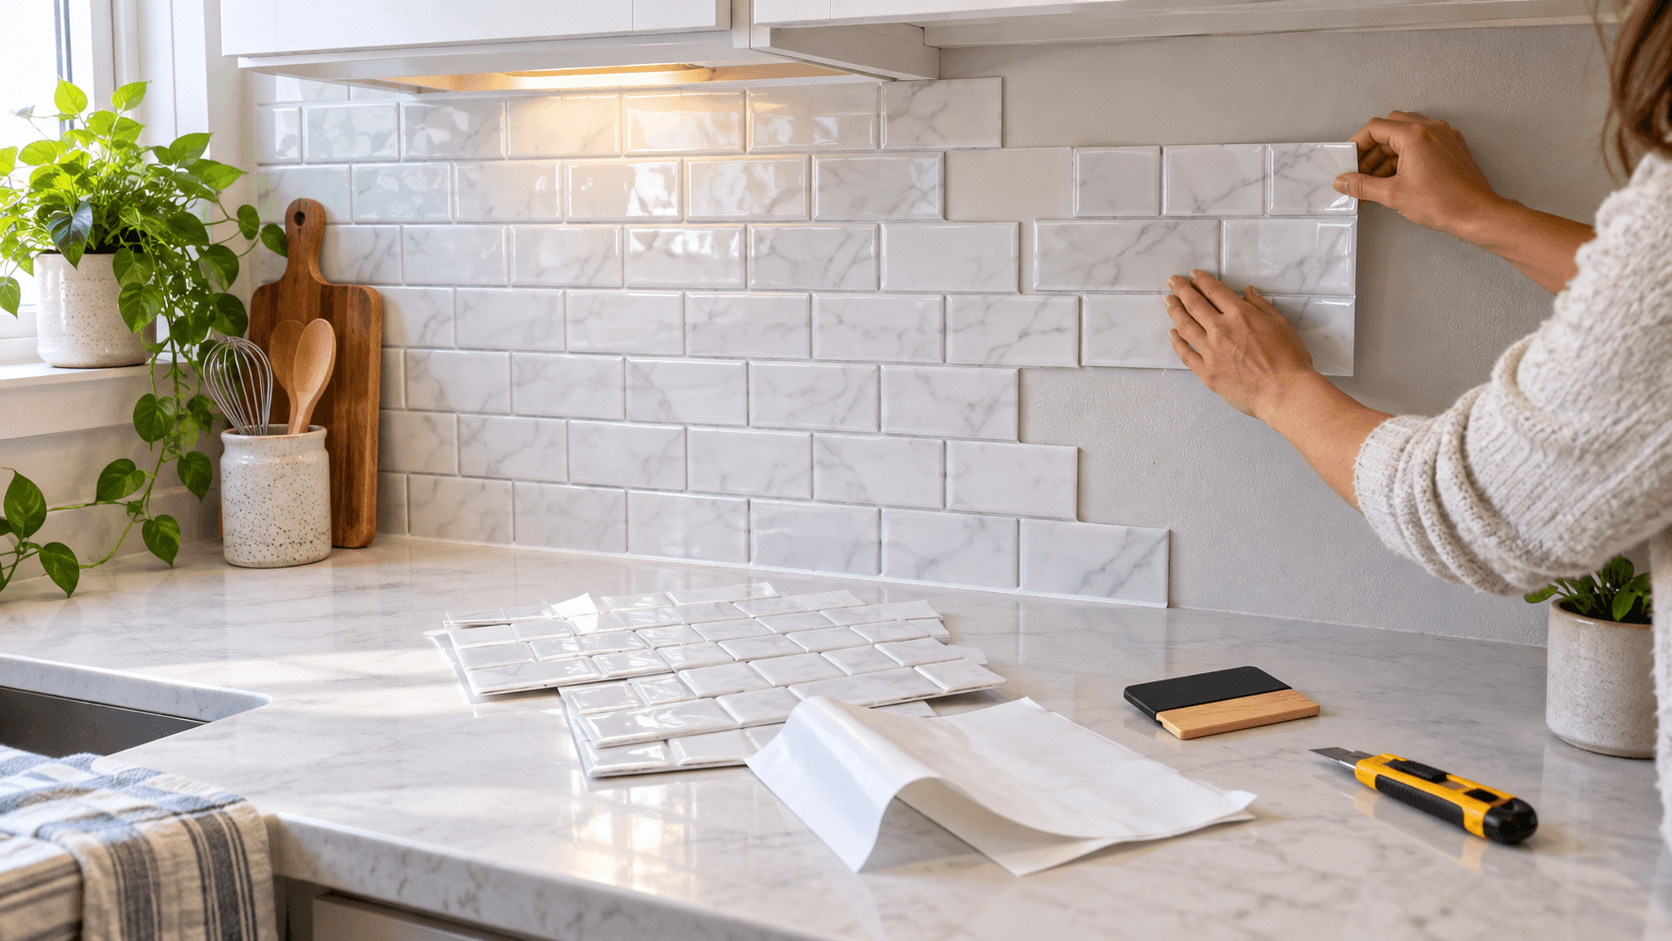
A kitchen backsplash is probably the most obvious example.
The wall behind a countertop does not receive foot traffic, furniture movement or standing water. If the surface is smooth, clean and properly prepared, a good peel-and-stick backsplash can look surprisingly polished.
It can also work well on a laundry-room wall, powder-room accent wall, pantry backsplash, bar area or other decorative surface that does not see extreme heat or constant moisture.
These are the kinds of projects where peel-and-stick makes sense because the consequences of failure are relatively small. If a section eventually needs to be replaced, you are dealing with a wall finish rather than ripping apart a shower or replacing an entire floor.
For more permanent kitchen finishes and other backsplash materials, see Builzee’s Kitchen Backsplash Ideas guide. It is worth comparing peel-and-stick against ceramic tile, slab materials and other options before deciding how permanent you want the project to be.
The Kitchen Backsplash Is Probably Its Sweet Spot
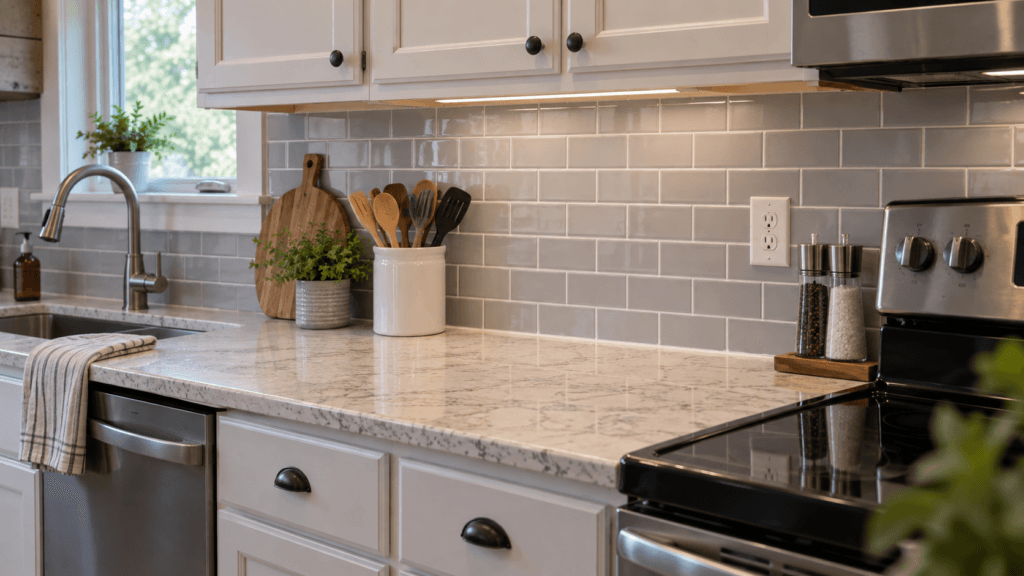
If I had to choose one application where peel-and-stick tile makes the strongest case for itself, it would be a kitchen backsplash.
A backsplash is visible enough that changing it can transform the room, but it is also relatively small and easy to work on.
That combination is important.
A homeowner can often finish the project without specialty tools, and the installation does not usually interfere with cabinets, plumbing or appliances beyond removing outlet covers and working carefully around edges.
Good peel-and-stick tile can also be much cleaner to install than traditional tile. There is no thinset to mix, no grout haze to scrub off and no waiting for mortar to cure before continuing.
That makes it particularly attractive for a rental, starter home or kitchen that needs a visual update before a larger remodel happens later.
Still, I would be careful around the range.
Some peel-and-stick products are approved near cooking surfaces, while others have minimum clearance requirements or specific heat limitations. Always check the manufacturer instructions before installing the material directly behind or beside a range.
A product that handles occasional countertop splashes is not automatically designed to tolerate repeated high heat.
Surface Preparation Matters More Than the Tile
Most failed peel-and-stick projects start before the first tile is installed.
The adhesive needs something solid, clean and reasonably smooth to grab onto. Dust, grease, loose paint, heavy wall texture and uneven flooring can all interfere with adhesion.
Kitchen walls deserve particular attention because cooking residue can be present even when the wall looks clean.
A quick wipe with a damp towel may not be enough.
The surface needs to be free of oils, cleaning residue and anything else that prevents the adhesive from making full contact.
The same principle applies to floors. A peel-and-stick floor installed over dust, loose material or a badly uneven substrate may begin lifting because the adhesive never had a stable surface to bond to in the first place.
For flooring applications, the preparation principles in Builzee’s Subfloors & Preparation guide still apply. Peel-and-stick flooring does not magically correct moisture problems, loose subfloors, humps or depressions underneath it.
It is a finish layer, not a repair system.
Textured Walls Can Be a Problem
This is one of the places where online before-and-after photos can be misleading.
Peel-and-stick tile looks best over a smooth surface.
If the drywall has a noticeable orange-peel, knockdown or other heavy texture, the tile may not make full contact with the wall. The texture can also telegraph through thin vinyl products and make the finished surface look uneven.
Some heavier products tolerate mild texture better than others, but I would not assume a heavily textured wall is ready for installation.
Smoothing the area first can make a big difference in both appearance and adhesion.
That adds another step to what was supposed to be an easy project, but skipping it often means dealing with lifting edges later.
Can You Put Peel-and-Stick Tile Over Existing Tile?
Sometimes.
A flat existing tile backsplash can actually provide a pretty good substrate if it is clean, secure and not heavily textured.
The challenge is the grout joints.
If the peel-and-stick material is thin, the grout lines underneath may eventually become visible through the surface. Deep joints can also leave areas where the adhesive does not have full support.
Thicker peel-and-stick products are better at hiding minor differences, but the existing tile still needs to be firmly attached and thoroughly cleaned.
I would also look closely at the edges of the project. Adding another layer changes the thickness around outlets, window returns, cabinets and exposed tile ends.
Those details are easy to overlook until the installation reaches them.
Peel-and-Stick Floor Tile Is a Different Decision
A backsplash mostly needs to stay attached to a wall.
A floor has to deal with footsteps, pets, furniture, cleaning, rolling loads and movement from the structure underneath.
That makes peel-and-stick floor tile much less forgiving.
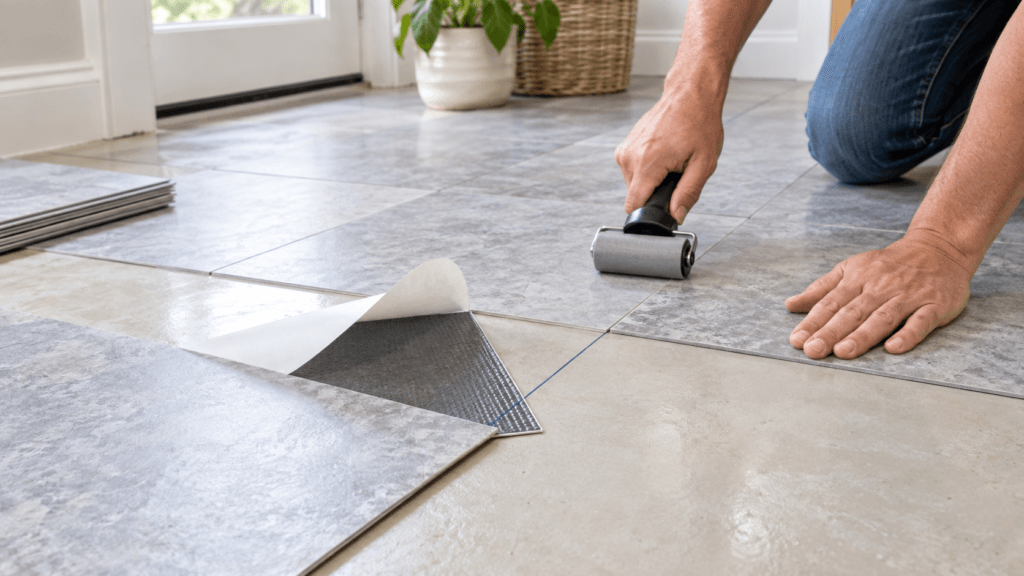
In a small powder room, closet, laundry area or low-traffic space, it can be a reasonable budget option when the substrate is excellent.
In a large kitchen, main living area or heavily traveled entry, I would be much more cautious.
Floor tile seams are especially important. Dirt and moisture can work into poorly bonded edges, and small installation errors are repeated across an entire room.
The substrate also needs to be very smooth because thin vinyl flooring can reveal imperfections underneath it.
This is where inexpensive flooring sometimes becomes less inexpensive than expected. If the floor needs patching, leveling or extensive preparation before the tile can go down, the advantage of using a quick adhesive product starts shrinking.
Bathrooms Need More Care Than Social Media Suggests
Peel-and-stick tile can absolutely be used in certain bathroom areas.
A powder-room floor, vanity backsplash or decorative wall can be a reasonable application if the product is designed for it.
A shower is another story.
I would not treat standard peel-and-stick tile as a substitute for a properly waterproofed tile assembly inside a shower or other continuously wet location.
Traditional shower construction relies on much more than the visible tile. Waterproofing behind the finish is what protects the structure.
A decorative adhesive tile stuck to drywall does not provide the same system.
Even if a product is advertised as water-resistant, check exactly where the manufacturer allows it to be installed. Splash resistance and direct shower exposure are not the same condition.
For homeowners planning a larger bathroom project, Builzee’s Bathroom Guides cover showers, waterproofing, materials and other renovation decisions where the finish surface is only one part of the complete assembly.
What About Behind a Sink?
Behind a bathroom vanity or kitchen sink is much more reasonable.
Those areas receive occasional splashing, but they are not normally subjected to constant saturation.
A well-installed peel-and-stick backsplash can perform well there, especially if seams are tight and exposed edges are finished carefully.
Water should still be wiped away rather than allowed to sit against the edges.
That is good practice with almost any finish material.
Heat Is Another Limitation
Adhesives react to temperature.
That becomes important around cooktops, ranges, fireplaces and other heat-producing surfaces.
A peel-and-stick backsplash may be completely fine behind a countertop while being inappropriate directly behind a high-output range.
The answer depends on the specific product.
Check the required clearance from heat sources and do not assume that a product’s appearance means it performs like ceramic tile.
Real ceramic or porcelain tile has very different heat characteristics from a thin vinyl product printed to look like tile.
How Long Does Peel-and-Stick Tile Last?
There is no useful single number.
A quality backsplash installed over a good surface in a dry area may last for years. A cheap product installed over dusty textured drywall may start lifting almost immediately.
Floor applications tend to be less forgiving because they experience more movement and wear.
The quality of the adhesive also matters, as does the condition of the room. Heat, moisture, sunlight and repeated cleaning can all affect how the material ages.
I would think of peel-and-stick tile as a finish whose lifespan depends heavily on the application rather than a material with a guaranteed number of years.
That is not necessarily a weakness.
If your goal is to update a rental or improve a room for a few years before a larger renovation, you may not need a thirty-year finish.
The important thing is matching the product to your expectations.
Does It Look Cheap?
Sometimes it does.
But that is not inevitable.
The biggest visual giveaway is usually not that the material is peel-and-stick. It is poor installation.
Crooked courses, misaligned patterns, badly cut edges and visible seams will make almost any product look inexpensive.
Product selection matters too.
Glossy printed surfaces with very little texture tend to look less convincing than thicker materials with realistic depth. Repeated patterns can also make fake stone or wood obvious across a large surface.
Use samples before committing to the whole room.
Look at them from normal viewing distance, not just from six inches away.
Natural light can reveal shine and surface texture that looked completely different in an online photo.
Corners, Outlets and Edges Are Where the Job Is Won or Lost
The middle of a peel-and-stick backsplash is usually easy.
The edges are where the project starts looking either finished or homemade.
Outlets need clean cuts. Inside corners need deliberate alignment. Exposed outside edges need some sort of planned termination rather than a rough cut simply stopping on the wall.
Before installing the first sheet, look at where the pattern will finish.
If the final piece beside a cabinet is going to be a tiny strip, adjusting the starting point slightly may produce a much better layout.
The same idea applies to flooring.
A few minutes spent planning the first and last rows can prevent awkward cuts later.
That is one of the reasons the basic layout principles in Builzee’s Flooring Installation guide still matter even when the flooring product itself seems simple.
Removal Is Not Always Damage-Free
Peel-and-stick tile is often promoted as renter-friendly.
It can be, but “peelable” does not necessarily mean “leaves the original surface perfect.”
Strong adhesive can pull paint from drywall. Older paint may separate from the wall. Residue can remain behind. Thin drywall paper can sometimes be damaged during removal.
Heat from a hair dryer may help soften some adhesives during removal, but results depend on the product and surface.
If you are renting, I would test a small area first and make sure the landlord allows adhesive finishes.
For a temporary backsplash, some renters install a removable intermediate panel rather than sticking the product directly to the wall. That makes the whole assembly easier to take down later.
The Biggest Pros Are Simplicity and Low Commitment
Peel-and-stick tile works because it removes several steps from traditional tile installation.
You do not need to mix mortar. Many products do not require grout. Cutting is often easier, especially with vinyl versions. The project can usually be completed in stages without leaving the room unusable for days.
It is also easier to change your mind.
That makes it attractive for homeowners who want to experiment with a pattern or color without making a large investment.
The material can be particularly useful when the existing room is functional but visually dated.
A backsplash is a perfect example. Changing cabinets, counters and flooring might be unnecessary, but replacing a tired wall finish can still make the kitchen feel noticeably newer.
The Biggest Cons Usually Show Up Later
The weaknesses are almost the reverse of the advantages.
Because the product depends heavily on adhesive, poor surface conditions become a long-term problem. Thin material can reveal imperfections underneath. Edges can lift. Printed finishes can look less convincing up close.
And unlike real tile, many peel-and-stick products are not intended to become a permanent architectural finish.
That does not mean they are bad.
It means you should not expect a $100 weekend backsplash to behave exactly like a professionally installed ceramic or stone backsplash that required substantially more material and labor.
Those are different solutions for different projects.
When I Would Use Peel-and-Stick Tile
I would be comfortable using a good-quality product for a kitchen backsplash when I wanted a relatively quick update without doing a full remodel.
I would also consider it for a powder-room accent wall, laundry-room wall, pantry, rental-friendly decorative project or other dry area where failure would be easy to correct.
For flooring, I would be more selective.
A closet, small utility area or temporary low-traffic room can make sense when the substrate is excellent and expectations are realistic.
The more square footage, traffic and moisture the project sees, the less appealing peel-and-stick flooring becomes to me.
When I Would Skip It
I would skip standard peel-and-stick products inside a shower or other continuously wet location unless the manufacturer specifically designed and approved the complete installation for that use.
I would also avoid installing it over a badly textured, loose or moisture-damaged surface simply because covering the problem seems easier than repairing it.
High-heat areas deserve caution as well.
And if I were already planning a major kitchen or bathroom remodel that involved new cabinets, countertops, plumbing and flooring, I would probably choose a more permanent backsplash at the same time rather than trying to save a small amount on one finish.
The context of the project matters.
Is Peel-and-Stick Tile Worth the Money?
It can be.
The value comes from saving time, lowering the installation barrier and allowing a room to change without a major commitment.
That is different from saying it is the cheapest material per square foot or the longest-lasting finish.
If a peel-and-stick backsplash gives you five years of use in a kitchen you were not ready to remodel, that may be excellent value.
If you install inexpensive floor tile across an entire house only to replace it two years later because the edges are lifting, it probably was not.
Look at the entire project rather than the price on the box.
Surface preparation, trim, wasted material, removal and eventual replacement all contribute to the real cost.
Bottom Line
Peel-and-stick tile is not a gimmick, but it is also not a universal replacement for traditional tile.
Its best applications are places where installation speed, affordability and low commitment matter more than maximum durability. Kitchen backsplashes, decorative walls, powder rooms and certain low-traffic areas are where it makes the most sense.
The product is only half the equation. A smooth, clean surface and careful layout matter just as much.
Treat it like a real finish material rather than a giant sticker, and the result can be surprisingly good. Expect it to perform like ceramic tile in every environment, and you are much more likely to be disappointed.
Planning a DIY Home Project?
Explore Builzee’s DIY Guides for practical help with painting, repairs, tile, caulking, installation and other home projects you can tackle yourself.