How to Fix Peeling Paint on Walls: Causes & Step-by-Step Repairs
Learning how to fix peeling paint on walls starts with one question: why did the paint let go? A loose paint film might come from an old glossy coating, rushed surface preparation, or moisture trapped in the wall. Scraping and repainting can make it look better for a while, but the problem often returns if the cause is still there.
This guide explains how to inspect a peeling wall, decide whether the drywall can be repaired, prepare the surface safely, choose the right primer, and finish with a paint job that has a better chance of lasting. It focuses on interior painted drywall; plaster, masonry, and exterior siding may need different preparation.
Quick answer: the right repair order
Stop the cause → remove loose paint → repair and smooth the surface → prime → repaint. If the drywall is soft, stained by an active leak, or breaking apart, repair the underlying damage first. Do not coat over moisture, loose layers, or torn drywall paper without proper preparation.
Why Is Paint Peeling Off Your Wall?
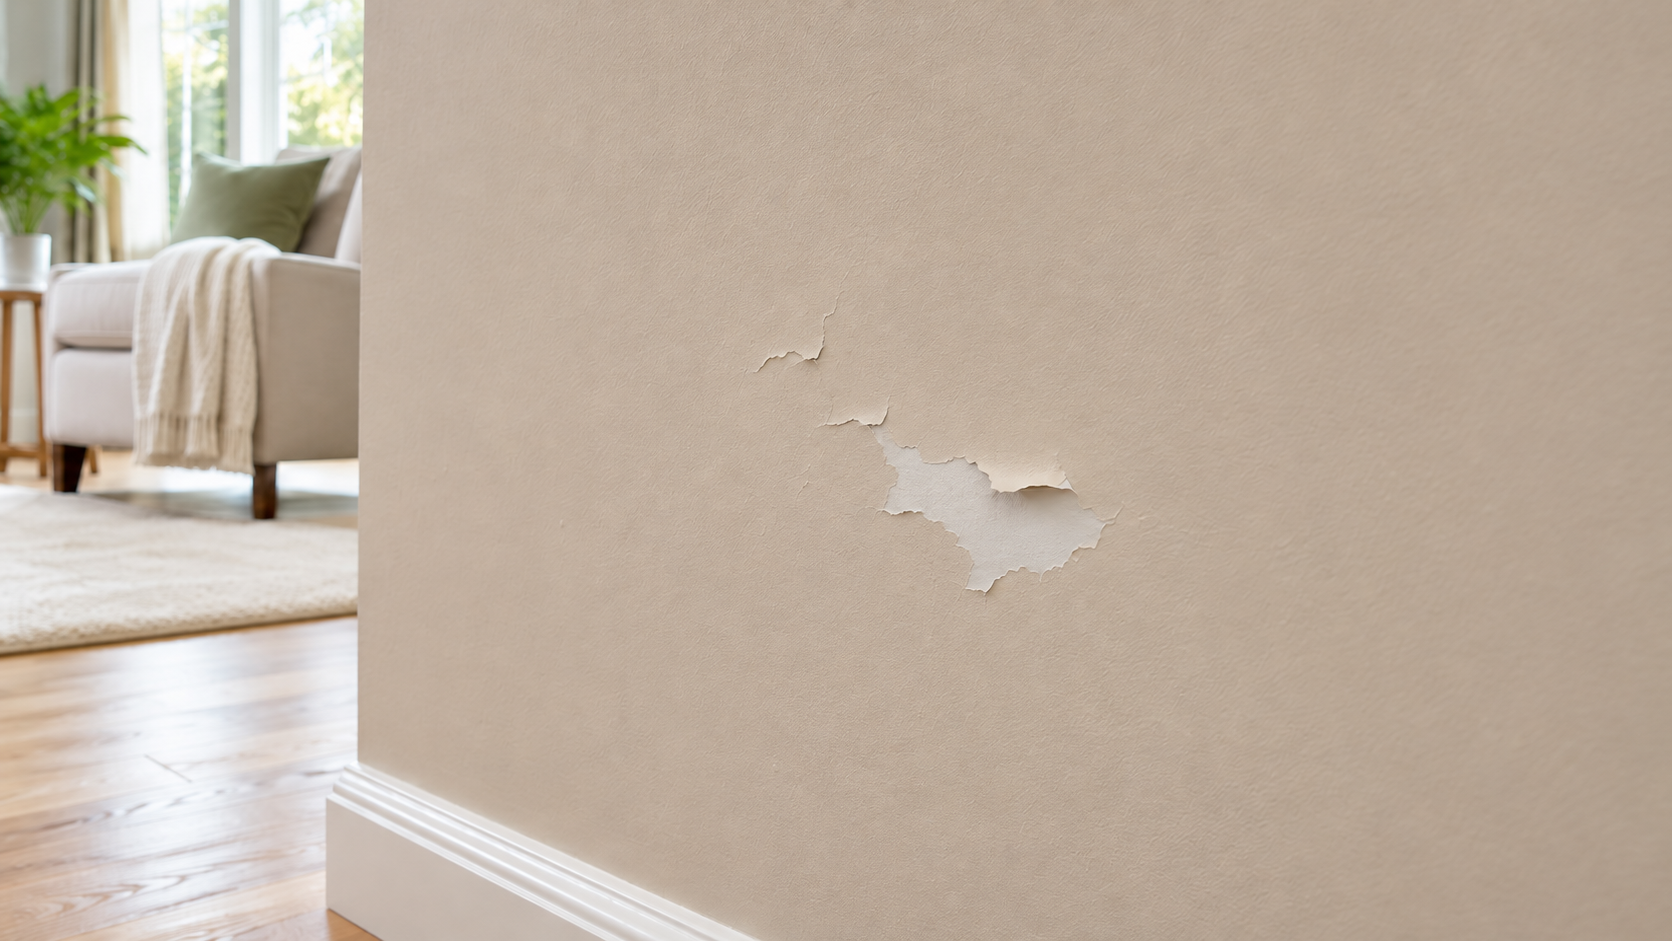
Peeling happens when the paint loses its bond with the layer beneath it. Sometimes the topcoat separates from an older coat of paint; other times several layers release together. The location of the damage and the condition of the wall offer clues, but appearance alone cannot confirm the cause.
Moisture or humidity
Paint may blister, bubble, or peel near windows, plumbing walls, ceilings, bathrooms, or poorly ventilated spaces.
Investigate: leaks, condensation, roof or window flashing, wet drywall, and ineffective bathroom ventilation.
Poor surface adhesion
New paint can release from old glossy paint, residue, dust, or a weak previous coating. It may pull off as relatively thin sheets.
Investigate: unclean walls, skipped deglossing, lack of suitable primer, or previous loose coats.
Application or drying problems
Painting over damp repairs, applying coats outside the recommended conditions, or recoating too soon can undermine the finish.
Investigate: product labels, drying times, temperature, ventilation, and previous repair materials.
Damaged wall material
Soft gypsum, damaged drywall face paper, unstable patching compound, or deteriorating plaster can cause paint to fail along with the surface.
Investigate: whether the material beneath the paint is dry, firm, and securely attached.
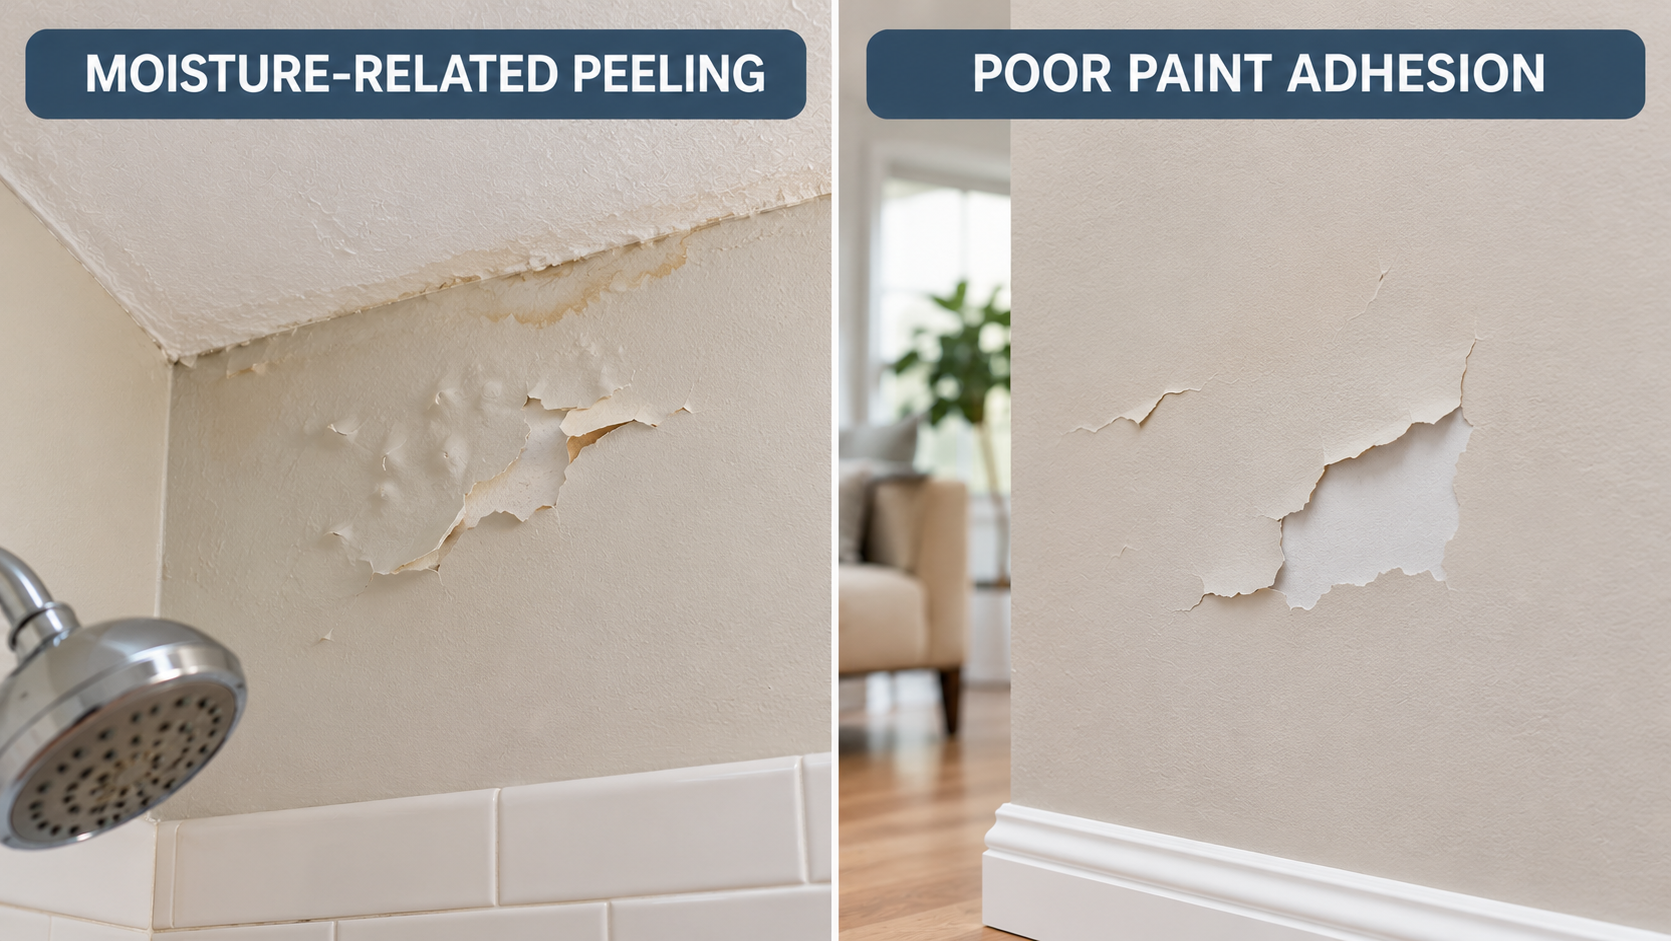
Paint manufacturer Sherwin-Williams identifies moisture, dirty or glossy surfaces, and weak underlying coatings as common contributors. Instead of assuming the paint itself was defective, work backward from the damaged area to understand what was beneath it.
Inspect the Wall Before You Start Scraping
Start by looking a few feet beyond the damaged spot. A single peeling patch on a dry bedroom wall is a different project from paint bubbling along a bathroom ceiling every few months.
- Check for moisture: Look for yellow-brown stains, dampness, swelling, recurring condensation, and peeling around the same location. Fix a leak or ventilation issue before refinishing.
- Check the substrate: Lightly probe the exposed surface. Drywall should feel firm. Soft, crumbly, swollen, or mold-damaged material may need replacement rather than a skim coat.
- Check adjacent paint: Where it is safe to disturb the coating, inspect the edges beyond the visibly peeled area. If a scraper easily lifts more paint, the unsound area is larger than it first appears.
- Check how widespread it is: A small isolated spot is often manageable. A whole wall of poor adhesion may justify broader removal and repainting rather than several small patches.
Important: lead paint in older homes
If your home was built before 1978, do not start dry sanding or scraping painted surfaces without assessing lead risk. Disturbing lead-based paint can create hazardous dust. The U.S. EPA recommends hiring a lead-safe certified contractor for renovation work in pre-1978 homes. If you do the work yourself, follow the EPA’s lead-safe DIY guidance. Requirements can also depend on whether the property is owner-occupied, rented, or used for child care.
Know when to stop: If paint keeps peeling after repeated repairs, a ceiling shows ongoing water stains, or the wall is soft, this is no longer just a paint problem. Address the underlying condition before applying a cosmetic finish.
Tools and Materials for a Peeling Paint Repair
You do not need a large collection of specialized tools for a small, dry, localized repair. Most of the work involves removing unsound material and getting the wall flat enough that the patched area disappears under paint.
Preparation and repair
- Drop cloth and painter’s tape
- Putty knife or flexible paint scraper
- Mild cleaner, sponge, and clean cloths
- Spackle or joint compound suitable for the repair
- 4–6 inch taping knife; wider knife for blending
- Fine-grit sanding sponge or paper, when safe
- Dust-control supplies and appropriate protection
Priming and painting
- Appropriate drywall or bonding primer
- Specialty sealer if drywall face paper is torn
- Matching interior wall paint
- Small roller, roller cover, and tray
- Angled paintbrush for edges
- Clean water or manufacturer-approved cleanup supplies
- Good lighting to check the wall finish
Buying tip: Match products to the actual surface rather than purchasing every specialty primer. Sound painted drywall, exposed bare gypsum, and glossy old paint may call for different preparation and primer choices. Read the product’s instructions before starting.
How to Fix Peeling Paint on Walls: Step by Step
These steps assume the paint is not suspected to contain lead, the wall is dry and sound, and any active moisture source has been corrected. If those conditions are not met, address them before proceeding.
Protect the area and identify the full repair boundary
Move furniture, cover the floor, and protect nearby trim. Use a work light held at an angle to reveal raised edges. Work outward from the visibly peeled patch and mark the general area where paint is loose. Do not automatically assume the remaining coating is sound just because it still looks intact.
Remove paint that is no longer bonded
Hold a scraper at a shallow angle and gently lift loose or flaking paint. Stop when you reach paint that remains firmly attached. Avoid digging into the gypsum board or gouging a large depression. If surrounding paint continues to lift easily, expand the repair instead of burying failing layers under filler.
For a wall with many weak layers, localized spot repair may be impractical. More extensive surface preparation may be needed.
Clean the wall and let it dry completely
Remove dust, grease, and other residue using a cleaner appropriate for the existing coating. Do not soak bare drywall. Wipe away cleaner residue as directed and allow the surface to dry. Fresh compound and paint will not bond reliably to dirt, wet surfaces, or a chalky layer.
Stabilize exposed drywall paper, if present
Look closely at the exposed area. Smooth, intact painted drywall generally needs different treatment from torn or fuzzy brown drywall face paper. If the paper has peeled or is fraying, carefully remove only unattached fibers and apply a sealer specifically approved for damaged drywall paper before adding water-based joint compound. This helps prevent the paper from bubbling during finishing.
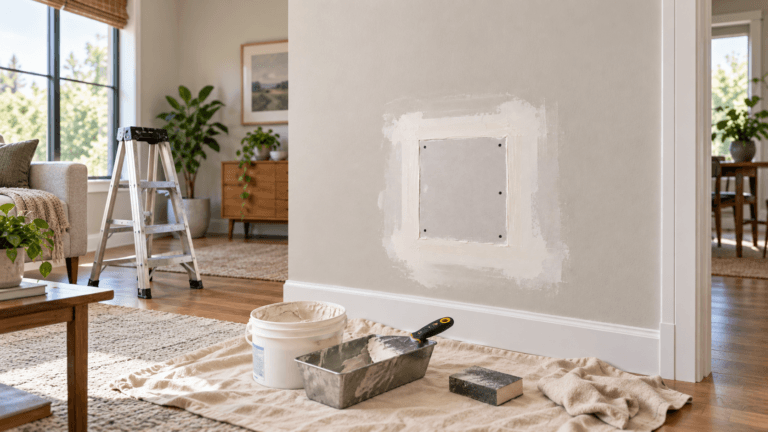
If the drywall itself is soft or crumbling, replace the damaged section instead. Our drywall patching guide explains when a supported patch is the better solution.
Fill defects and feather the edges
Use suitable patching compound to fill shallow gouges and level the transition between old paint and exposed wall. Apply thin coats with a taping knife, extending each pass slightly beyond the damaged area. A wider feathered edge usually hides a patch better than a thick mound directly over the peeled spot.
Let each coat dry or set according to its product instructions. Reapply as needed rather than trying to correct a deep area with one heavy coat.
Sand smooth and remove the dust
When the patch is completely dry, lightly smooth high spots and blend the repair into the adjacent wall. Use a light held across the surface to find ridges. Do not oversand the surrounding drywall paper or create a recessed patch. Remove the dust thoroughly before applying primer.
Match any existing orange-peel, knockdown, or other wall texture before priming. Even perfectly flat paint will not conceal an unmatched texture.
Prime the repaired area
Apply the primer recommended for the exposed substrate and existing surrounding coating. Spread it evenly over the repaired patch, slightly beyond the compound edges. Primer helps even out porosity, improves adhesion where appropriate, and reduces the chance that the patch will flash through the finish paint.
Follow the primer label for coverage, ventilation, drying time, and recoat conditions. Some challenging surfaces need a specialty bonding or sealing primer rather than an ordinary drywall primer.

Repaint and blend the wall
After the primer has dried as directed, apply the finish paint with a suitable roller. Maintain a consistent application pattern and respect the manufacturer’s recommended spread rate. A second coat is often needed for even color and sheen.
If you have the exact original paint, a small touch-up may blend acceptably. But wall age, paint sheen, texture, and lighting can make even a close color match visible. For the least noticeable result, consider painting the full wall from corner to corner. See our how to paint a room guide for cutting-in, rolling, and room preparation techniques.
What a successful repair looks like: The surface is dry and firm; no loose edges remain; the patched area is flush with the surrounding wall; and the new finish has an even appearance without bubbling, ridges, or obvious color changes.
What Primer Should You Use Over Peeling Paint Repairs?
Primer choice depends on what remains after you remove the loose material. There is no single primer that solves moisture damage, weak coatings, and torn drywall paper all at once. A product can bond to its immediate surface and still fail if the layer beneath it is unstable.
| Wall condition after preparation | Typical primer approach | Important caution |
|---|---|---|
| Sound bare drywall or dry patching compound | Interior drywall primer suitable for new porous repairs | Let the compound dry fully and remove sanding dust. |
| Sound but glossy old paint | Prepare or degloss as directed; use compatible bonding primer when needed | Primer cannot rescue loose or contaminated paint beneath it. |
| Torn, fuzzy drywall face paper | Specialty damaged-drywall paper sealer approved for that purpose | Stabilize the paper before using a water-based skim coat. |
| Dry, previously stained surface after leak repair | Compatible stain-blocking primer if staining could bleed through | Confirm the leak is repaired and the assembly is dry first. |
| Soft, damp, or mold-damaged drywall | No primer is an adequate substitute for repair | Find the moisture source and assess whether the board needs removal. |
These are product categories, not interchangeable specifications. Use the manufacturer instructions and the actual wall condition to choose a compatible system.
Is paint-and-primer-in-one enough?
Paint labeled “paint and primer” may cover an existing sound painted surface well. It does not automatically replace a dedicated primer over bare joint compound, exposed gypsum, torn face paper, stains, or difficult glossy coatings. Separate preparation and priming are usually the safer choice for a repair with mixed surface conditions.
What paint finish works best?
Choose a wall paint suitable for the room and use a sheen consistent with the surrounding finish. Flat or matte finishes tend to show fewer surface imperfections, while many eggshell or satin finishes offer better wipeability. In bathrooms, ventilation and an appropriate moisture-resistant paint system are more important than assuming a higher sheen alone will stop peeling.
Common Mistakes That Make Paint Peel Again
Avoid these shortcuts
- Painting before a leak is resolved
- Stopping removal while edges are still loose
- Spackling directly over fuzzy drywall paper
- Skipping cleaning or dust removal
- Applying one thick coat of compound
- Using finish paint as a substitute for all primers
Do this instead
- Confirm the wall is sound and dry
- Extend preparation to firmly bonded paint
- Seal damaged face paper correctly
- Feather and texture the repair
- Prime before the finish coats
- Follow the coating system’s drying conditions
Why is new paint peeling off in sheets?
This often points to a bond failure between coatings, especially if the wall was glossy or contaminated before painting. It may also mean the original layer is weak. Inspect the exposed surface rather than simply applying another topcoat. Depending on the extent of the failure, larger-scale removal and proper bonding preparation may be needed.
Why does the patch show through after painting?
Visible patch outlines can result from uneven compound thickness, differences in texture, or porous repairs that were not adequately primed. Strong side lighting makes these differences more obvious. Sand and feather the affected area, restore the wall texture, spot-prime or prime the wall as required, and apply a consistent finish coat.
Why does bathroom paint keep bubbling?
Repeated bubbling near a shower or ceiling often suggests recurring moisture exposure, but the cause still needs confirmation. Check for active leaks and condensation, verify that the bathroom exhaust fan works effectively, and allow the wall to dry before repair. If paint is failing over soft drywall or persistent staining, the underlying wall assembly may need further evaluation.
DIY Repair or Hire a Professional?
For a dry, isolated paint patch on sound drywall, the work is mainly careful preparation and finishing. Many homeowners can handle it with basic tools. The more uncertain the substrate or the moisture source, the less useful another cosmetic repair becomes.
| Situation | Reasonable next step |
|---|---|
| Small, dry patch; surrounding paint is firmly bonded | DIY surface preparation, light patching, primer and paint. |
| Wide area of peeling; several weak paint layers | Assess whether larger-scale preparation and full-wall refinishing are needed. |
| Soft or swollen drywall, recurring water stains, suspected hidden leak | Investigate the water source and repair or replace damaged material before painting. |
| Possible lead paint in a pre-1978 home | Follow EPA lead-safe guidance; consider a lead-safe certified professional. |
| Repeated failure after multiple repair attempts | Have the underlying surface and moisture conditions evaluated. |
How can you avoid paying twice?
Spend the first part of your budget on the reason the coating failed, not on a more expensive finish paint. A small repair can become wasteful when new paint hides an active leak for only a few weeks. Similarly, patching ten small areas on a wall with widespread adhesion failure may take longer and look worse than preparing and painting the entire wall once.
When hiring a contractor, ask whether the proposal includes finding the cause, protecting the work area, removing unsound coatings, treating damaged drywall paper, matching texture, priming, and painting the entire wall if necessary. These steps are easy to omit from a quote that simply says “patch and paint.”
Frequently Asked Questions
Can I paint directly over peeling paint?
No. Paint applied over loose layers inherits the same weak bond. Remove unsound paint, address the cause, prepare and prime the surface, then apply the finish coating.
Do I need to remove all the old paint?
Not necessarily. For a localized repair, sound, firmly adhered old paint can often remain. Remove loose material and ensure the surrounding edge is stable. If the coating fails across a broad area, wider removal may be necessary.
Do I need primer after using spackle or joint compound?
Generally, yes. New patching compound is more porous than surrounding painted drywall, and a suitable primer helps create a more consistent surface for the finish coat. Follow the repair and primer product instructions.
How long does peeling paint repair take?
A small repair can involve several separate work sessions because cleaning, patching, priming, and painting each require adequate drying or recoat time. The actual schedule depends on the depth of the patch, humidity, temperature, and the specific products. Never use a fixed drying time in place of the instructions on the container.
Can I just use spackle where the paint peeled?
Only after all loose paint is removed and the substrate is sound. Spackle or joint compound can level a shallow depression, but it does not repair active leaks, failing paint beneath the patch, or damaged drywall face paper that needs sealing.
Should I repaint the patch or the whole wall?
A small touch-up sometimes blends with the existing paint. For a better match in color, sheen, and texture, repainting the full wall from corner to corner is often more reliable, especially if the original paint has aged.