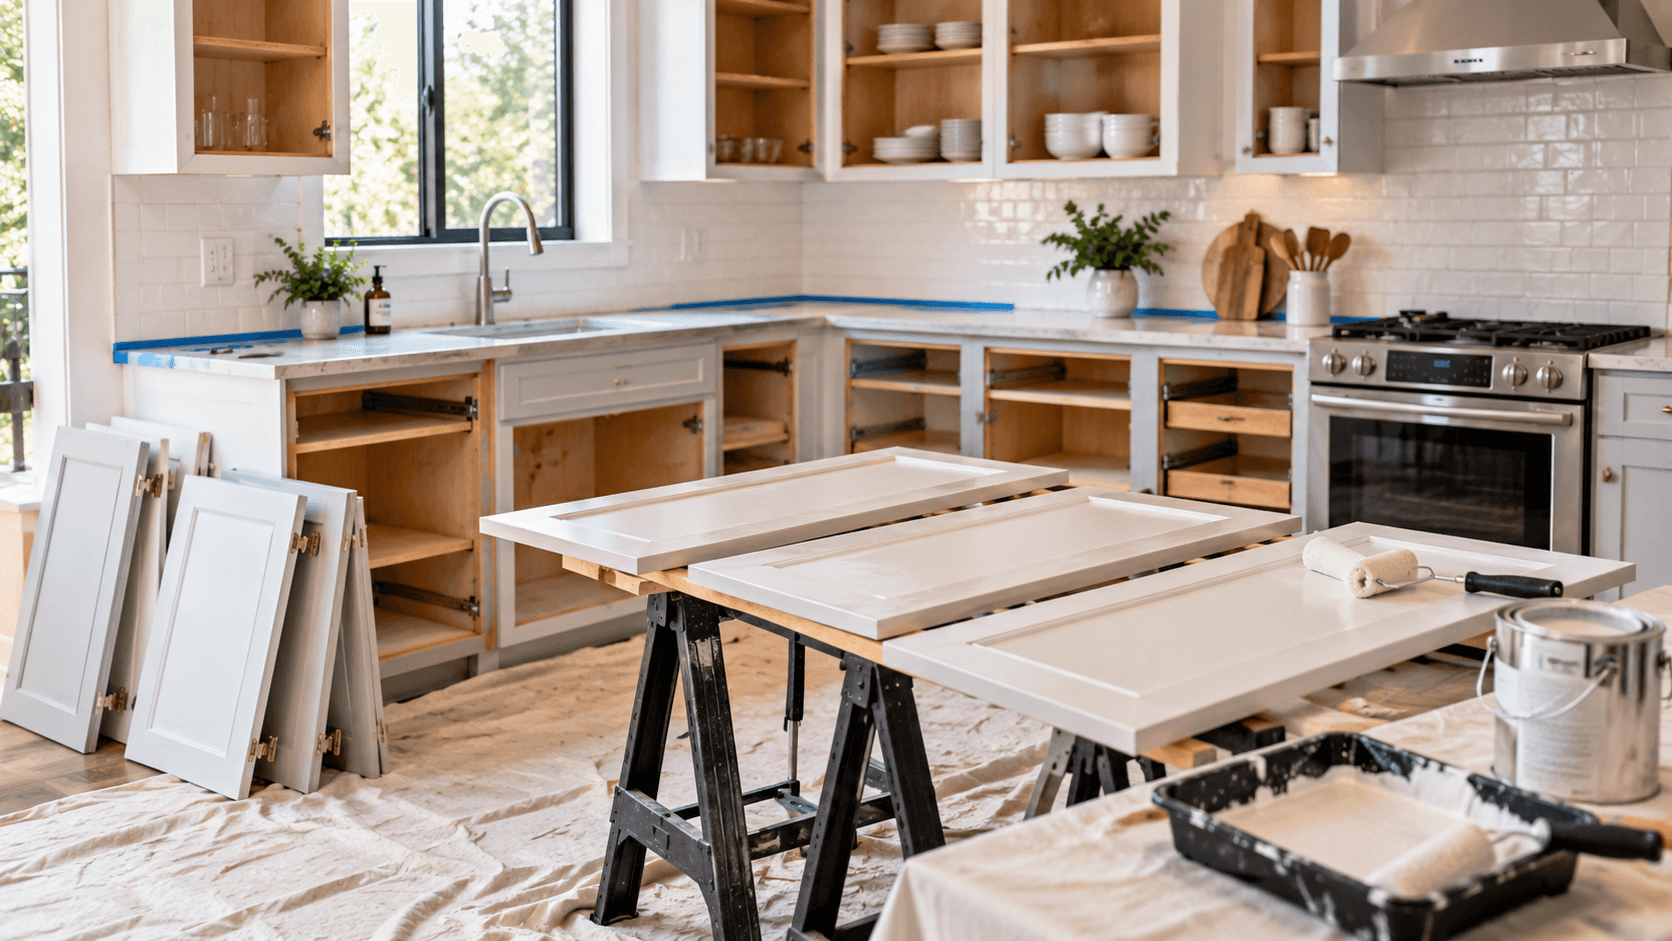
How to Paint Kitchen Cabinets: A Step-by-Step Guide
Learning how to paint kitchen cabinets is about more than changing the color. The lasting results come from removing grease, preparing the old finish, choosing a compatible primer and cabinet paint, and giving the coating enough time to cure.
Painting sound cabinetry can make a kitchen feel substantially different without replacing the boxes or changing a layout you already like. But paint will not correct swelling, loose joints, failing veneer, or a poorly functioning kitchen. Start by checking whether your cabinets are worth refinishing.
Label the doors, degrease thoroughly, repair damage and scuff the finish.
Choose a compatible primer and a coating specifically made for cabinetry or trim.
Follow the product’s drying, recoating and curing instructions. Dry to touch is not fully cured.
Can You Paint Your Existing Kitchen Cabinets?
Most solid wood, wood-veneer and paint-grade MDF doors can be painted successfully when the surface is sound. Previously painted cabinets can also be refreshed if the old coating is properly bonded. Slick laminate and thermofoil need more caution, because paint performance depends on the surface and adhesion system.
| Cabinet surface | What to know before painting |
|---|---|
| Solid wood | Generally a good candidate. Repair damage, prepare the old finish and use a suitable primer; certain species can bleed tannins. |
| Wood veneer | Paintable if firmly bonded. Use a gentle scuff so you don’t sand through the thin outer layer. |
| Paint-grade MDF | Provides a smooth painted surface when sound. Water-swollen areas and exposed edges need special attention. |
| Laminate / glossy manufactured finish | Often needs careful cleaning and a manufacturer-approved bonding primer. Test adhesion before doing the entire kitchen. |
| Thermofoil | Loose or peeling vinyl isn’t made sound by painting over it. Repair or replace affected panels first. |
Check for loose hinges, warped doors, swelling around the sink, peeling finish, grease near the range, and cabinet boxes that are no longer square. Painting changes appearance, not construction. If the boxes or layout are failing, compare other options in Builzee’s Kitchen Cabinets & Storage Guide.
Tools and Materials You’ll Need
The exact products depend on the existing finish. Use this checklist while you prepare your work area. Checkboxes are for convenience and reset when the page is reloaded.
A paint sprayer can give a very smooth finish, but it also requires masking, overspray control, ventilation, protective equipment and cleanup. You can get excellent results using a brush and smooth roller.
How to Paint Kitchen Cabinets: 10 Steps
You don’t have to finish everything in one weekend. Follow the sequence below, and let product instructions determine the actual waiting time between coats and before returning the cabinets to normal use.
Remove Doors, Drawer Fronts and Hardware
Remove doors and hardware rather than trying to paint around hinges and pulls. When practical, take off drawer fronts too. Mark each piece and its cabinet opening with matching numbers, and store screws in labeled bags. Even nearly identical doors can differ slightly in hinge positions or adjustments.
Photograph the kitchen and hinge positions before disassembly. Set up a clean area with supports that allow painted pieces to dry without touching one another.
If you are changing knob or pull locations, decide on the new hardware pattern now, before you fill holes and apply primer.
Clean and Degrease Every Surface
Kitchen cabinets hold cooking oil, fingerprints, cleaning-product residue and food film even when they look clean. Paint and primer won’t bond reliably to a contaminated surface. Give extra attention to handles, the edges of upper cabinets near the range, the sink base, trash pullouts and dishwasher-adjacent panels.
Use a cleaner approved for the existing finish, follow the instructions, rinse away residue if required, and allow the cabinets to dry completely before moving on. This preparation is more demanding than ordinary wall painting because cabinet surfaces are handled and scrubbed repeatedly.
Repair Dents, Holes and Loose Areas
Inspect all parts in good light. Fill small dents and unused hardware holes with a suitable filler. Fix loose joints and repair damaged trim before coating. If you’re changing the location or spacing of pulls, use a hardware template so every new hole ends up in the correct place.
Do not cover swollen MDF, separated veneer or damaged door joints with paint and hope for the best. Those problems need proper repair or replacement, and some panels may not be worth refinishing.
Scuff Sand the Existing Finish
You usually do not need to strip the cabinet to bare wood. The goal is to dull glossy coatings, smooth filled repairs and improve the surface for the specified primer. Work evenly over door faces, edges, drawer fronts, face frames and exposed ends. Use an abrasive appropriate for the surface, and avoid cutting through thin veneer or rounding door details.
Vacuum thoroughly, then remove remaining dust with the cleaning method approved by the coating manufacturer. Check profiles and corners where sanding residue tends to collect.

Do not dry-sand an old coating that may contain lead until it has been evaluated. If lead is present, use appropriate lead-safe procedures. Review the EPA’s lead-safe renovation guidance for DIYers.
Can you skip sanding? Some primers permit minimal preparation on specific surfaces. Only skip scuffing when the product manufacturer explicitly approves the method for your exact existing finish. A small adhesion test is worth doing on a slick cabinet.
Prime with a Compatible Product
Primer helps the new coating grip the old surface and can limit wood tannins or staining from showing through the finish. Choose primer for what you are painting: a stain-blocking system for bleed-prone wood, an adhesion system approved for slick laminate, or a compatible primer for sound existing paint.
Apply thin, even coats, especially near grooves and inside corners. Once dry, inspect for raised grain, dust nibs or minor roughness. Lightly sand if the manufacturer permits it, then clean all dust before applying finish paint.
Choose a Cabinet-Grade Paint
Ordinary interior wall paint is not designed for repeated door handling and cleaning. Choose a product specifically formulated for cabinets, doors or trim, and make sure it is compatible with the primer underneath. Common systems include waterborne alkyds, acrylic enamels and urethane-reinforced cabinet coatings.
Satin and semi-gloss finishes are popular because they are generally easier to wipe down than very flat finishes, without being as reflective as full gloss. Follow the product’s guidance for preparation, ventilation, application conditions and cure time.
Choose Between Brush, Roller and Sprayer
You don’t need commercial equipment to paint cabinets well. Select the method that fits your cabinet details, work space, skill and desired finish.
Brush
Best for: corners, trim, narrow profiles and face frames. Work carefully to avoid prominent brush marks.
Smooth roller
Best for: flat doors, drawer fronts and exposed cabinet sides. Avoid heavy-nap rollers that leave texture.
Sprayer
Best for: many detached doors and an even, smooth finish when spraying can be done safely. Requires more setup and cleanup.
For many DIYers, a quality brush for tight profiles combined with a small smooth-finish roller on broad faces is practical and produces a good finish.

Apply Thin, Even Coats
Heavy paint can sag, collect in details and stay soft longer. Use thin coats instead, and respect the manufacturer’s recoat interval. Temperature, humidity and airflow can all change how quickly the coating dries. A surface that feels dry may not be ready for another coat.
Where the coating instructions allow it, a very light fine-abrasive sand between coats can smooth dust or roller texture. Remove every trace of dust before the next coat. Keep painted doors separated while they dry.
Check the surface under angled light after each coat. Drips along profiles, door edges and molding are much easier to correct early than after the coating has hardened.
Let the Paint Cure Before Heavy Use
Drying and curing are not the same thing. Cabinet paint may feel dry within hours while the coating continues to develop hardness for days or longer. Freshly painted cabinet doors are especially vulnerable to sticking, scuffs and marks around hinges and knobs.
Follow the paint manufacturer’s cure guidance. Avoid hard cleaning, stacking freshly painted pieces, bumping them together, or exposing shelves to heavy use too early. Build this waiting period into your project schedule.
Reinstall, Align and Adjust the Hardware
Once the finish is ready for handling, return each door and drawer front to its labeled opening. Reinstall hardware, adjust hinges, and look for consistent gaps across rows of doors. Test hinges and drawer slides and confirm they clear neighboring fronts.
For new knobs or pulls, use a hardware jig to keep placements consistent. Save a little matching paint for future touch-ups, and keep the paint product information for its cleaning and maintenance instructions.
Seven Common Cabinet Painting Mistakes
Most disappointing paint jobs fail for predictable reasons. Use these checkpoints before you start coating the first door.
Preparation mistakes
- Painting over grease: residue under primer can weaken adhesion.
- Skipping surface prep: glossy old finishes need an approved adhesion strategy.
- Painting damaged cabinets: swelling or loose joints won’t disappear under a fresh coat.
- Failing to label doors: reinstallation and alignment become unnecessarily difficult.
Painting and curing mistakes
- Using wall paint: it may not handle cabinetry’s regular contact and cleaning.
- Applying thick coats: drips, slow curing and buildup show around profiles.
- Reinstalling too soon: the finish may stick, scratch or imprint before it hardens.
Cabinet Painting Questions Worth Answering
Should You Paint Inside the Cabinets?
Usually only if there’s a reason. Sound interior shelves and box interiors can be left alone, reducing labor and wear risk. Painting interiors may make sense if they are visible through glass doors, heavily discolored, damaged or part of a complete color change. Painted shelves need adequate cure time before storing dishes.
How Long Does It Take to Paint Kitchen Cabinets?
The active cleaning, prep and painting work may span several days, but the full project can take longer once drying, recoat windows and curing are included. Door count, cabinet detail, product choice and work environment affect timing. Plan for a longer period of gentle use after the last coat.
Is Painting Kitchen Cabinets Worth It?
Often yes, if the cabinet boxes are sturdy, doors function properly and you still like the layout. Paint and new hardware can be a smart cosmetic refresh. It is less appealing when cabinets have widespread water damage, unusable storage or an inefficient layout. Compare a paint refresh against the broader scope described in Kitchen Remodeling Cost & Buying.
Should You Also Replace the Hardware or Backsplash?
Not necessarily, but modest changes can complement the painted finish. New pulls, updated lighting or a backsplash may improve the look without replacing every cabinet. Prioritize the improvements that solve real problems, and avoid unnecessary work if your kitchen already functions well.