
SUBFLOORS & PREPARATION
Prepare the Floor Before the New Flooring Goes Down
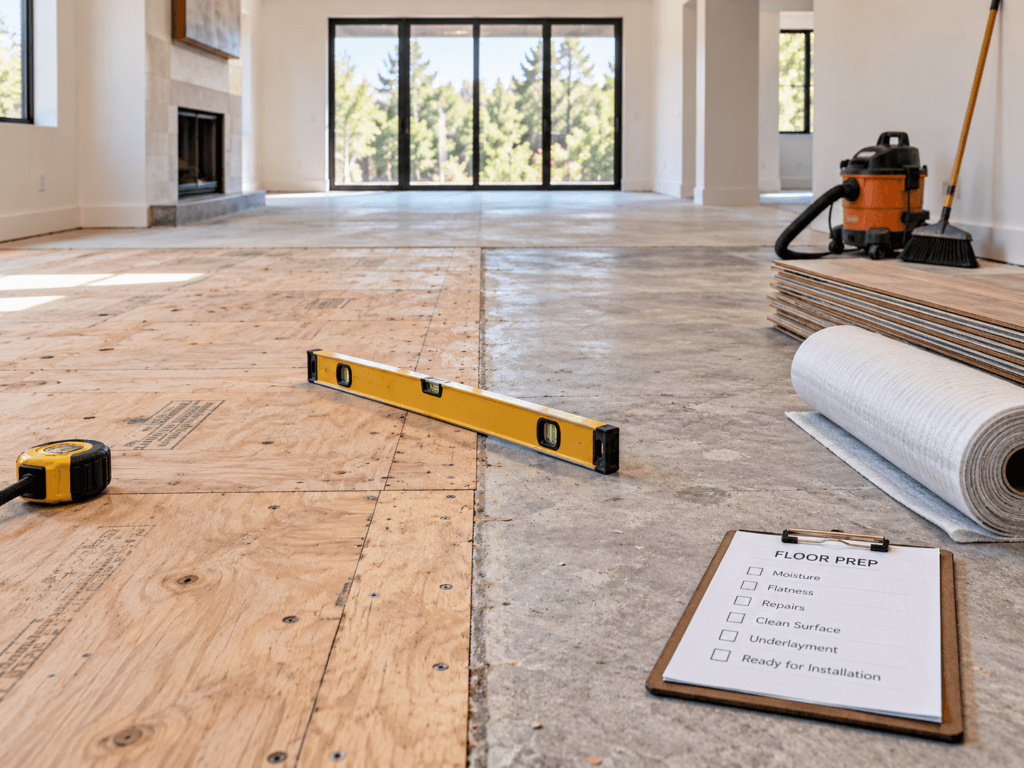
A finished floor can only perform as well as the surface underneath it. Proper flooring subfloor preparation includes checking concrete and wood subfloors, moisture, flatness, existing flooring, underlayment and other conditions before installation begins.
START WITH THE BASICS
Know What Is Under the Floor Before You Start
Good flooring subfloor preparation starts with understanding what is already beneath the finished floor. The subfloor needs to be dry, stable, clean and flat enough for the flooring system being installed.
Wood subfloors and concrete slabs behave differently, and each can have issues that are easy to miss once new flooring covers them. Moisture, movement, cracks, low spots, loose panels and leftover adhesive should be addressed before installation begins.
The goal is not to make every floor perfectly level. It is to create a surface that meets the requirements of the flooring product and installation method you plan to use.
IDENTIFY THE SUBFLOOR
Start by Identifying What Is Under the Finished Floor
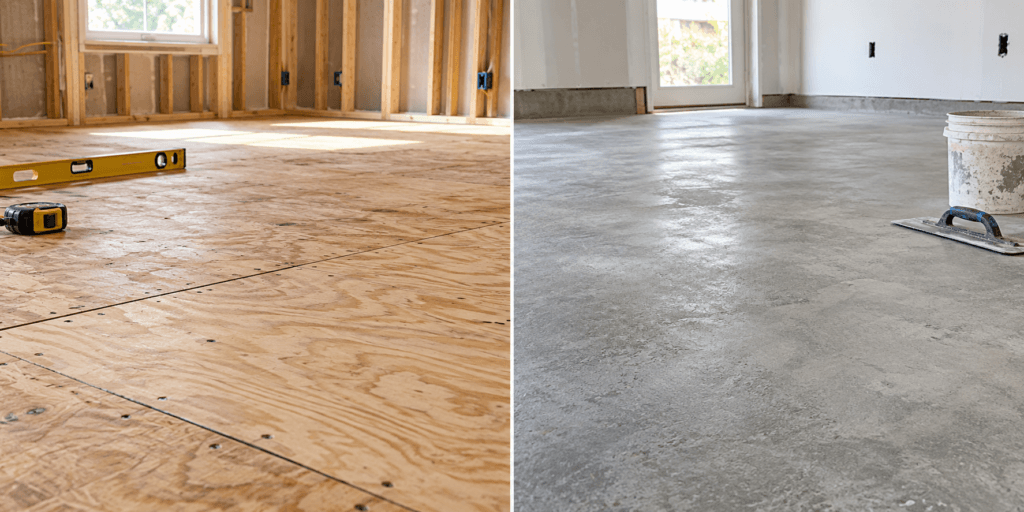
Before choosing underlayment, adhesives or an installation method, confirm whether the new flooring will be installed over a wood subfloor, concrete slab or another approved surface. Different substrates require different preparation, moisture checks and repair methods.
WOOD SUBFLOORS
What should you check with plywood, OSB or plank subfloors?
Wood subfloors should feel solid underfoot without excessive flex, movement or squeaking. Check for loose panels, damaged areas, raised fasteners, swollen edges and joints that may need to be secured or repaired before new flooring is installed.
Plywood and OSB are common in newer construction, while older homes may have plank subfloors beneath another layer of sheathing. The flooring manufacturer may require minimum thickness, fastening or panel conditions depending on the product and installation method.
GOOD TO KNOW
A wood floor does not need to look perfect before it is covered, but it does need to be structurally sound, sufficiently flat and appropriate for the flooring system going over it.
CONCRETE SLABS
What matters most when flooring is installed over concrete?
Concrete needs to be evaluated for moisture, cracks, surface contamination and flatness before flooring is installed. Paint, adhesive residue, curing compounds or other materials left on the slab may also interfere with certain adhesives or floor systems.
New concrete may require substantial curing time before it is ready for flooring, and below-grade slabs can introduce additional moisture concerns even when the surface looks dry.
GOOD TO KNOW
Do not assume a concrete slab is ready simply because it feels hard and dry. Moisture testing and preparation requirements should follow the flooring and adhesive manufacturer’s instructions.
PREPARATION SEQUENCE
What to Check Before Flooring Installation
Floor preparation is easier to manage when it follows a clear sequence. The exact requirements vary by flooring type, but these checks should generally happen before installation begins.
01 — IDENTIFY THE EXISTING FLOOR & SUBFLOOR
What are you actually installing over?
Confirm whether the existing surface is plywood, OSB, plank subfloor, concrete or another approved substrate. Also identify any existing flooring or underlayment that may need to be removed.
02 — CHECK FOR MOISTURE
Is the subfloor dry enough for the new flooring?
Evaluate moisture conditions using the testing method required for the flooring and installation system. Concrete and wood need different testing approaches, and visible dryness alone is not enough.
03 — CHECK FLATNESS
Are there high spots, dips or abrupt changes?
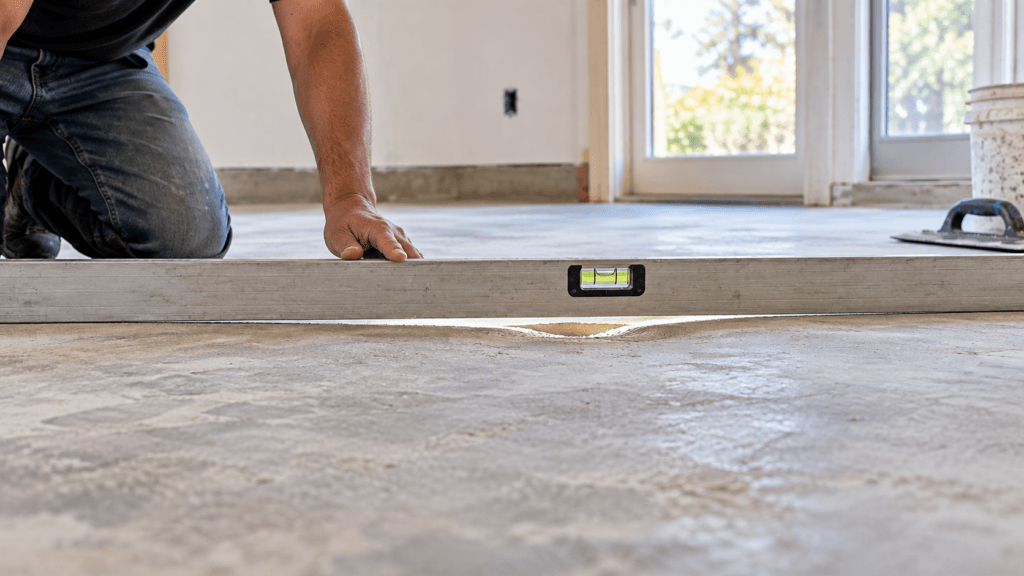
Use an appropriate straightedge or level to identify uneven areas. Flooring manufacturers typically specify how flat the substrate needs to be over a given distance.
04 — LOOK FOR MOVEMENT OR DAMAGE
Does anything flex, squeak, crack or feel loose?
Repair loose panels, damaged wood, unstable areas, significant cracks and other defects before covering them with new flooring.
05 — DECIDE WHAT CAN REMAIN
Can the existing flooring stay in place?
Some flooring systems may be installed over an existing surface if it is sound, flat, clean and approved by the manufacturer. Other conditions require removal first.
06 — DETERMINE UNDERLAYMENT NEEDS
Does the flooring need a separate layer underneath it?
Underlayment may provide cushioning, sound control, moisture management or separation between materials. Some flooring products already include an attached pad and may not allow an additional layer.
07 — PLAN FLOOR HEIGHT & TRANSITIONS
How will the finished floor meet adjacent surfaces?
Consider doors, cabinets, appliances, thresholds, stairs and neighboring flooring before adding layers that change the finished elevation.
08 — CLEAN & PREP THE SURFACE
Is the substrate actually ready for installation?
Remove dust, debris, protruding fasteners and contaminants that could interfere with flooring, adhesive or underlayment. Complete the final checks before material installation begins.
GOOD TO KNOW
The correct sequence can vary depending on the flooring product, subfloor and installation method. Always compare the actual jobsite conditions with the flooring, adhesive and underlayment manufacturer’s requirements before work starts.
MOISTURE CONDITIONS
Moisture Can Affect Flooring Long After Installation
Moisture problems are one of the most common causes of flooring failures. Even when a subfloor looks dry, moisture can still be present at levels that affect adhesives, wood products, resilient flooring and other finish materials. The correct testing method depends on the substrate and the flooring system being installed.
CONCRETE MOISTURE
Concrete can hold moisture even when the surface appears completely dry.
New and existing concrete slabs may contain moisture that moves toward the surface over time. Excess moisture can interfere with adhesives, contribute to flooring movement and cause discoloration, bubbling or other failures.
Common evaluation methods may include:
- In-slab relative humidity testing
- Calcium chloride testing where permitted
- Surface moisture meters as a preliminary screening tool
- Manufacturer-required testing for the specific flooring or adhesive system
Do not assume that an older slab is automatically dry enough for installation. Site conditions, vapor control and slab construction can all affect moisture levels.
WOOD MOISTURE
Wood flooring and wood subfloors respond to changes in moisture content.
Plywood, OSB and other wood substrates can expand, contract or distort when moisture levels change. Excess moisture may contribute to swelling, squeaks, movement or damage to the finished flooring above.
Before installation:
- Check the moisture content of the wood subfloor
- Compare readings with the flooring manufacturer’s requirements
- Look for signs of water intrusion, staining or damaged panels
- Allow wet materials to dry before covering them
- Confirm that the building is enclosed and interior conditions are reasonably stable
For hardwood and other moisture-sensitive products, installers may also compare the moisture content of the flooring material with the subfloor before installation.
GOOD TO KNOW
There is no single acceptable moisture reading for every flooring system. Limits and testing procedures vary by flooring type, adhesive, underlayment and manufacturer. Always follow the requirements for the actual products being installed.
FLATNESS & LEVELNESS
A Floor Does Not Have to Be Perfectly Level, But It Does Need to Be Flat
“Flat” and “level” are often used interchangeably, but they are not the same thing. A floor can slope slightly and still be flat enough for flooring installation. The bigger concern is usually abrupt high spots, low areas, humps or dips that prevent the flooring from sitting properly.
FLATNESS
Are there dips, humps or sudden changes in the surface?
Check the substrate with a long straightedge, level or other method recommended by the flooring manufacturer. Areas that fall outside the allowable tolerance may need correction before installation.
Common problems include:
- High seams between plywood or OSB panels
- Low spots in concrete slabs
- Ridges from patching or old adhesive
- Raised fasteners
- Localized humps
- Depressions near walls, doorways or transitions
Many flooring manufacturers specify a maximum variation over a certain distance, so the actual requirement should always be confirmed for the product being installed.
LEVELNESS
Does the floor slope from one side of the room to the other?
A gradual slope does not always prevent flooring installation if the surface remains flat and stable.
However, larger elevation changes may become important around:
- Door openings
- Cabinets
- Appliances
- Stair landings
- Thresholds
- Adjacent flooring
Correcting a major slope can become a larger structural or leveling project and should not automatically be treated the same as filling a small low spot.
CORRECTING HIGH & LOW AREAS
The repair method depends on the substrate and the size of the problem.
High areas may require:
- Sanding or planing wood
- Grinding concrete
- Removing ridges or hardened material
- Resetting protruding fasteners
Low areas may require:
- Approved floor patch
- Cementitious leveling material
- Self-leveling underlayment where appropriate
- Additional subfloor work for larger wood-floor depressions
The repair material must be compatible with the substrate and the flooring system installed above it.
GOOD TO KNOW
Do not use the finished flooring itself to “bridge” an uneven substrate. Floating floors, rigid planks, tile and glued flooring can all develop problems when installed over excessive high or low areas. Always verify the flooring manufacturer’s flatness requirements before making repairs.
SUBFLOOR CONDITION
Fix Damage and Movement Before It Gets Covered
Once new flooring is installed, access to the subfloor becomes much more difficult. Any loose panels, damaged areas, movement or squeaks should be investigated before the finished floor goes down.
DAMAGED AREAS
Is the subfloor structurally sound?
Look for conditions that may prevent the subfloor from providing a solid base.
Watch for:
- Swollen or delaminated plywood
- Soft or deteriorated wood
- Broken panel edges
- Large cracks or damaged concrete
- Unstable previous repairs
- Water staining or signs of an active leak
Badly damaged material may need to be removed and replaced before flooring installation.
MOVEMENT
Does the floor flex or shift underfoot?
A subfloor should feel solid and stable before the finished flooring goes down.
Watch for:
- Loose subfloor panels
- Noticeable flex or bounce
- Movement at panel joints
- Inadequate fastening
- Damaged framing below
- Areas that shift when walked on
Determine the cause of movement rather than simply covering it with new flooring.
SQUEAKS
Where is the noise coming from?
Squeaks usually occur when wood components move against each other or against fasteners.
Common causes include:
- Loose subfloor panels
- Movement between the subfloor and framing
- Improper or insufficient fastening
- Gaps between materials
- Older framing that has shifted over time
Squeaks are usually easier to correct while the subfloor is exposed.
REPAIR BEFORE INSTALLATION
Repairs should address the actual cause of the problem rather than simply covering the symptom.
Depending on the condition, preparation may include:
- Adding or replacing approved fasteners
- Replacing damaged subfloor sections
- Repairing loose panel edges
- Filling or repairing cracks where appropriate
- Correcting framing or support issues
- Allowing water-damaged materials to dry or replacing them completely
If damage appears structural or the cause is unclear, it may require evaluation beyond normal flooring preparation.
GOOD TO KNOW
Do not assume underlayment or thicker flooring will solve a moving or damaged subfloor. The finished flooring performs best when the surface beneath it is already solid, dry and stable.
EXISTING FLOORING
Can You Install New Flooring Over the Existing Floor?
Sometimes, yes. But the existing floor has to be more than just “still there.” It needs to be stable, flat, clean and compatible with the new flooring system. Installing over an existing surface can save demolition time, but it can also create problems if the material below is loose, damaged or adds too much finished-floor height.
INSTALL OVER EXISTING FLOORING
When can the old floor stay?
Some flooring systems may be installed over an existing surface when it is:
- Firmly bonded or securely fastened
- Flat enough for the new flooring
- Clean and free of contaminants
- Dry and in good condition
- Compatible with the new flooring system
- Approved by the flooring manufacturer
Existing vinyl, tile, hardwood, plywood or concrete may sometimes remain, depending on the product being installed.
REMOVE THE EXISTING FLOORING
When is removal the better option?
Removal is usually necessary when the existing floor is:
- Loose, cracked or unstable
- Water damaged
- Heavily uneven
- Soft or deteriorated
- Covered with multiple old layers
- Not approved as a substrate
Removal may also be needed when the existing floor creates clearance, transition or height problems.
WATCH THE FINISHED FLOOR HEIGHT
Adding another flooring layer can change the finished elevation more than expected.
Before installing over an existing floor, check:
- Door clearance
- Appliance clearance
- Cabinet toe kicks
- Stair transitions
- Exterior doors
- Thresholds
- Adjacent flooring
Even a small thickness difference can become noticeable at transitions and openings.
GOOD TO KNOW
Installing over an existing floor is not automatically easier or better. The condition of the existing material and the requirements of the new flooring system should determine the approach. Always verify that the flooring manufacturer allows installation over the existing surface.
UNDERLAYMENT
Not Every Floor Needs the Same Layer Underneath
Underlayment is not simply an extra cushion. Depending on the flooring and substrate, it may be used for sound control, moisture management, minor surface separation or other specific purposes. The important part is using the type approved for the flooring system being installed.
SOUND & CUSHIONING
Does the flooring system require an acoustic or resilient layer?
Some floating floors use underlayment to reduce sound transmission and provide a small amount of cushioning beneath the finished floor.
This is especially common with:
- Laminate
- Engineered floating floors
- Some luxury vinyl plank systems
- Multifamily or upper-floor installations
More cushioning is not always better. Excessively soft underlayment can allow too much movement at the flooring joints.
MOISTURE & VAPOR CONTROL
Does the assembly need protection from moisture below?
Certain installations, especially over concrete, may require a vapor retarder or other moisture-control layer.
The correct product depends on:
- The substrate
- The flooring type
- Whether the floor is above or below grade
- The manufacturer’s installation requirements
- The moisture conditions found during testing
A moisture barrier should not be added automatically without confirming that it is compatible with the complete flooring system.
SEPARATION & SURFACE COMPATIBILITY
Does the flooring need a layer between it and the substrate?
Some underlayments create separation between materials, provide a suitable bonding surface or help isolate minor substrate conditions.
Examples may include:
- Tile underlayment or backer products
- Uncoupling membranes
- Approved plywood underlayment
- Resilient flooring underlayment
- Manufacturer-specific installation membranes
The layer used beneath the flooring must be appropriate for both the substrate below and the finished material above.
FLOORING WITH ATTACHED PAD
Some flooring products already have underlayment attached to the back. Do not assume that adding another layer will improve the installation. Many manufacturers limit or prohibit additional underlayment because too much compression can affect locking joints, stability and warranty requirements. Always check the product instructions before adding anything beneath flooring with an attached pad.
GOOD TO KNOW
Underlayment cannot correct a damaged, wet or significantly uneven subfloor. The substrate should already meet the flooring manufacturer’s requirements before the underlayment is installed.
FLOOR HEIGHT & TRANSITIONS
Plan the Finished Floor Height Before Installation Starts
Every layer added to the floor changes the finished elevation. Flooring, underlayment, membranes, patching materials and existing surfaces can all affect how the new floor meets doors, cabinets, appliances and neighboring rooms. These conditions are much easier to solve before the flooring goes down.
DOORS & THRESHOLDS
Will doors still open and close properly?
Check how the new floor height will affect:
- Interior doors
- Exterior doors
- Sliding doors
- Closet doors
- Thresholds and tracks
Added flooring thickness can reduce clearance quickly.
ADJACENT FLOORING
How will the new floor meet the next room?
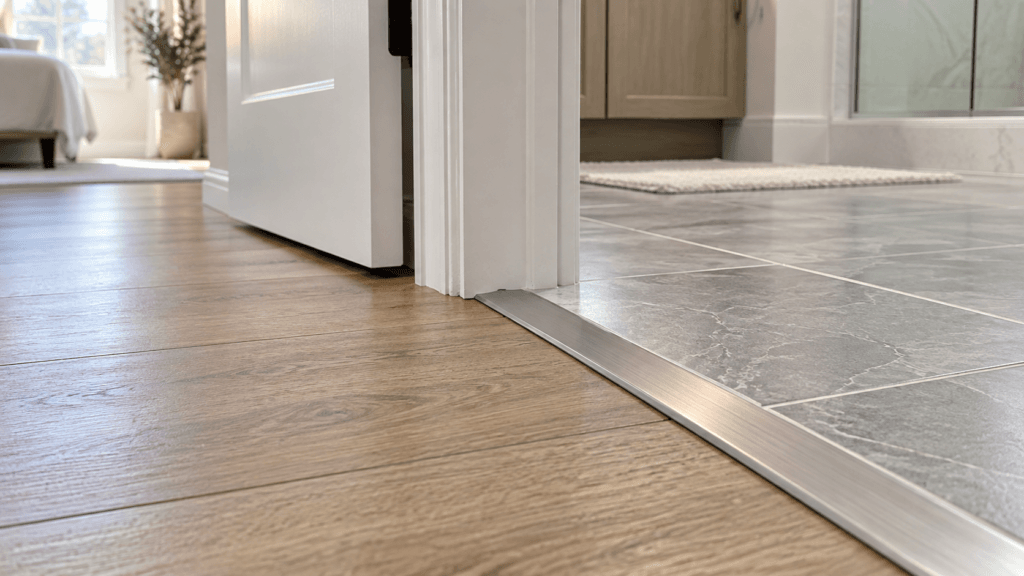
Compare the finished height of both surfaces before installation.
Common transition options include:
- Reducer strips
- T-moldings
- Thresholds
- Flush transitions
- Custom trim or profiles
Planning the transition early usually creates a cleaner finished result.
CABINETS & APPLIANCES
WWill added floor height interfere with built-in components?
Check clearances around:
- Refrigerators
- Dishwashers
- Ranges
- Cabinet toe kicks
- Islands
- Built-in appliances
Avoid creating conditions where appliances become trapped by the new floor height.
STAIRS & ELEVATION CHANGES
Does the new flooring affect a step or stair?
Check how the added thickness affects:
- First and last stair risers
- Stair landings
- Step-down conditions
- Raised thresholds
- Nearby elevation changes
Even small height changes can become noticeable around stairs and steps.
PLAN THE COMPLETE FLOOR ASSEMBLY
Before installation, add up the thickness of everything that will remain beneath the finished surface, including:
- Existing flooring that will stay
- Underlayment
- Moisture-control layers
- Membranes
- Leveling or patch materials
- The new flooring itself
This gives a much better picture of the actual finished elevation.
GOOD TO KNOW
Floor height problems are often discovered too late because each individual layer seems thin. Looking at the complete floor assembly before installation helps prevent awkward transitions, clearance problems and trapped appliances.
ACCLIMATION & JOBSITE CONDITIONS
Let the Flooring Adjust Before Installation
Some flooring products need time to adjust to the temperature and humidity of the space where they will be installed. Others may require little or no acclimation at all. The key is to follow the manufacturer’s instructions rather than relying on a universal waiting period.
BUILDING CONDITIONS
Is the space actually ready for finished flooring?
Before flooring is delivered or installed, the building should generally be:
- Enclosed and weather-tight
- Protected from active water intrusion
- At normal occupied temperature
- At reasonably stable indoor humidity
- Major wet construction work completed where possible
Large changes in building conditions can affect flooring after installation.
TEMPERATURE & HUMIDITY
Are indoor conditions close to normal living conditions?
Before installation:
- Operate heating or cooling systems as required
- Avoid extreme temperature swings
- Maintain the manufacturer’s recommended range
- Check conditions in the actual installation area
- Keep conditions reasonably stable during installation
The goal is to install flooring under conditions similar to normal occupancy.
MATERIAL ACCLIMATION
Does the flooring need time to adjust before installation?
Depending on the product, preparation may include:
- Storing the flooring inside the installation space
- Allowing time for temperature adjustment
- Checking moisture content where required
- Keeping cartons packaged or opened as directed
- Following the manufacturer’s stated acclimation period
- Confirming whether acclimation is required
Not every flooring product needs the same acclimation period.
STORAGE BEFORE INSTALLATION
Keep flooring materials:
- Indoors and protected from moisture
- In the manufacturer-recommended position
- Away from direct heat sources
- Out of garages, patios or other uncontrolled areas unless specifically permitted
- Protected from construction damage
Packaging should be opened only as directed by the flooring manufacturer.
GOOD TO KNOW
“Acclimate for 48 hours” is not a universal flooring rule. The correct process depends on the flooring material, installation method and manufacturer.
BEFORE INSTALLATION
Flooring Subfloor & Preparation Checklist
Before flooring installation begins, confirm that the substrate, materials and surrounding conditions are ready. Problems are much easier to correct before the finished floor goes down.
□ Existing flooring and subfloor have been identified
□ Moisture conditions have been tested where required
□ Subfloor flatness meets the flooring requirements
□ High and low areas have been corrected
□ Damaged or unstable areas have been repaired
□ Loose panels, movement and squeaks have been addressed
□ Existing flooring has been removed where necessary
□ Surface is clean and free of debris or contaminants
□ Required underlayment or membranes are confirmed
□ Flooring with attached pad has been checked for compatibility
□ Finished floor height has been planned
□ Door and appliance clearances have been checked
□ Transitions to adjacent flooring are planned
□ Stair and elevation changes have been reviewed
□ Flooring has been acclimated if required
□ Jobsite temperature and humidity are appropriate
Bottom Line
A successful flooring installation starts with what is underneath the finished material. Moisture, flatness, movement, floor height and jobsite conditions can all affect how the floor performs after installation.
Take the time to correct substrate problems before installation begins and follow the flooring, adhesive and underlayment manufacturer’s requirements for the specific products being used.