
How to Install Baseboards: Measuring, Cutting & Finishing
Learning how to install baseboards is mostly about getting the layout and joints right. Nailing the trim to the wall is usually straightforward; measuring around door casings, cutting corners that are not perfectly square, and finishing the joints are what separate a clean result from a rushed one.
This guide walks through planning your material, preparing the wall, cutting inside and outside corners, fastening the boards, and finishing the top edge and nail holes. It focuses on common painted wood and MDF baseboards in residential rooms.
Tools and Materials for Installing Baseboards
You do not need a full trim-carpentry shop to install basic baseboards, but a dependable saw, a way to locate wall framing, and a method for making small adjustments will save time. Buy a little extra trim so a bad corner cut does not stop the project.
Tools to gather
- Tape measure, pencil and speed or combination square
- Miter saw with an appropriate sharp blade
- Coping saw and file or sandpaper for profiled inside corners
- Stud finder and level or straightedge
- Finish nailer or hammer and nail set
- Utility knife, small pry bar and putty knife if removing old trim
- Safety glasses, hearing protection and dust collection
Materials and finishing supplies
- Baseboard molding in the chosen profile and lengths
- Correctly sized finish nails for the trim and wall backing
- Paintable acrylic-latex caulk for wall-to-trim joints
- Appropriate wood filler or nail-hole filler
- Fine-grit sanding supplies and cleaning cloth
- Primer and trim paint, or stain and finish for stain-grade wood
- Wood glue for suitable miter and scarf joints
Which baseboard material should you choose?
Consistent and easy to paint, often a practical choice for dry interior rooms. Cut edges need proper sealing; it is less forgiving of repeated moisture exposure.
Paint-grade wood with good workability. It can be easier to repair or sand than MDF, but check pieces for straightness before buying.
Solid wood suits stain-grade finishes and period details. PVC can suit some moisture-prone locations, but follow its specific cutting, fastening and temperature-movement instructions.
Older-home safety: Removing painted trim can disturb old coatings. If the home was built before 1978, review the EPA’s lead-safe renovation guidance before scraping, cutting or sanding existing painted surfaces. EPA recommends using a lead-safe certified contractor for work that may disturb lead paint.
Measure Baseboard Length Before Buying
Baseboards are estimated in linear feet, not floor square footage. Draw a simple plan of the room and measure every wall segment where trim will actually be installed. Stop your measurements at door casings, cabinets or other finished interruptions. Note outside corners separately because miter cuts can consume more material than a straight cut.
Four walls total 52 linear feet. If a doorway interrupts roughly 3 feet of baseboard, the measured trim run is about 49 linear feet. Allow extra for miters, damaged cuts, scarf joints and future repairs.
A seven-piece purchase of 8-foot lengths provides 56 linear feet on paper, but may not yield the exact cuts you need. Make a board-by-board cut plan; an extra length is often sensible when the room has outside corners or several short pieces.
Measure long runs at more than one point, especially when the wall is wavy. Write the wall name, length, corner type and any door-casing termination on painter’s tape attached to the back of each piece. For a long wall, plan an unobtrusive scarf joint rather than a blunt square butt joint in the middle of the run.
If you are installing a floating floor such as click-lock LVP, the flooring typically goes in first and the baseboard conceals its required perimeter expansion gap. The baseboard fastens to the wall and must not pin the floating floor in place. See Builzee’s vinyl plank flooring installation guide for floor-specific requirements.
How to Cut Baseboard Inside and Outside Corners
Corners are where trim installation becomes real finish carpentry. An ordinary room can look square while its corners are a degree or two off. Use the actual wall geometry, make test cuts from scrap, and dry-fit before fastening.

Inside corner: cope the profile
For decorative profiles, install one board with a square end against the adjacent wall. Cut a 45-degree miter on the mating board to reveal its molding profile, then use a coping saw to remove the waste behind that contour. A slight backcut helps the shaped edge fit against the face of the first board. Sand or file a little at a time until the joint closes.
Outside corner: miter both pieces
At a true 90-degree outside corner, two complementary 45-degree cuts form the joint. Mark the long points carefully, cut a little long initially, and dry-fit both pieces together. If the wall angle is not 90 degrees, measure it and adjust both cuts. A small amount of suitable wood glue can help keep a well-fitted joint together.
For plain square-edge baseboards, a clean square butt at an inside corner may be suitable. For profiled moldings, coping often hides movement and out-of-square walls better than using two inside miters. The right choice depends on the trim profile and the finished look you want.
Two 45-degree cuts only form a perfect joint when the corner is actually 90 degrees. Check unusual corners and practice with scrap, particularly around bay windows or walls that are not square.
What about long baseboard runs?
When one board does not reach the next corner, use an angled scarf joint. Cut overlapping ends so the joint sheds light rather than displaying a straight seam. Position it where there is solid backing if possible, dry-fit both pieces, and glue or fasten according to the trim material. Avoid forcing a bowed board flat with excessive nail pressure.
How to Install Baseboards, Step by Step
Work one wall at a time. Start with the easiest long run to establish your trim height and technique before tackling the most visible outside corners or complicated returns.
Remove old trim and prepare the wall
If replacing existing baseboards, score the paint or caulk line along the top before prying. Protect the drywall with a broad putty knife behind the pry bar, work near fastening points and pull remaining nails safely. Patch major wall damage, remove debris and allow damp areas to dry before covering them with trim.
Check floor height and locate framing
Use a straightedge or level to see whether the floor changes height along the wall. Decide whether the trim should follow the floor closely, be scribed to irregularities, or have a consistent top line with shoe molding covering minor bottom gaps. Locate and mark studs or suitable wall backing. Check for plumbing, electrical and other concealed services before driving fasteners.
Measure each piece and label its ends
Measure the actual distance between a corner and its casing or between two corners. Mark whether each end is square, coped, outside mitered or scarfed. For an outside corner, account for the miter’s long point; cutting to the wall’s short-point dimension can leave the board too short.
Cut, dry-fit and adjust
Cut the board on a stable saw setup with the workpiece fully supported. Keep hands outside the blade’s marked safety zone and follow the saw manufacturer’s instructions. Hold the trim in place without nailing; make small adjustments until the inside joint, outside corner and casing termination fit neatly.
Fasten the baseboard to the wall
Place finish nails through suitable solid portions of the baseboard into studs or structural wall backing. Use a fastener length and gauge appropriate for the trim thickness and wall assembly. Keep nail heads slightly below the surface for filling, without splitting the edge or crushing MDF. Fasten gradually along the board instead of locking in one end while the other is misaligned.
Continue around the room and retest joints
Install mating corner pieces together so the fit stays consistent. Check corners again after nailing because a bowed wall can open a seam that looked tight during dry fitting. Make careful adjustments before filling or caulking, rather than relying on a thick bead to hide a poor joint.
Floating floor warning: Do not nail or screw the baseboard or shoe molding through a floating floor. Also avoid wedging the trim down so hard that it prevents the flooring from moving. Conceal the expansion space while preserving the clearance required by the flooring manufacturer.
Fill Nail Holes, Caulk the Top Edge and Paint
Good finish work is subtle. The goal is a smooth painted baseboard with no visible nail depressions, a clean wall-to-trim line and tight corners. This is also the stage where it is easy to make a mess by applying too much caulk.
Fill nail holes and minor surface defects
Use a suitable filler for the board material. Press it into the small nail depressions, let it dry, then sand it smooth with fine-grit paper. Do not leave a raised patch; it will show after painting.
Caulk small gaps along the upper edge
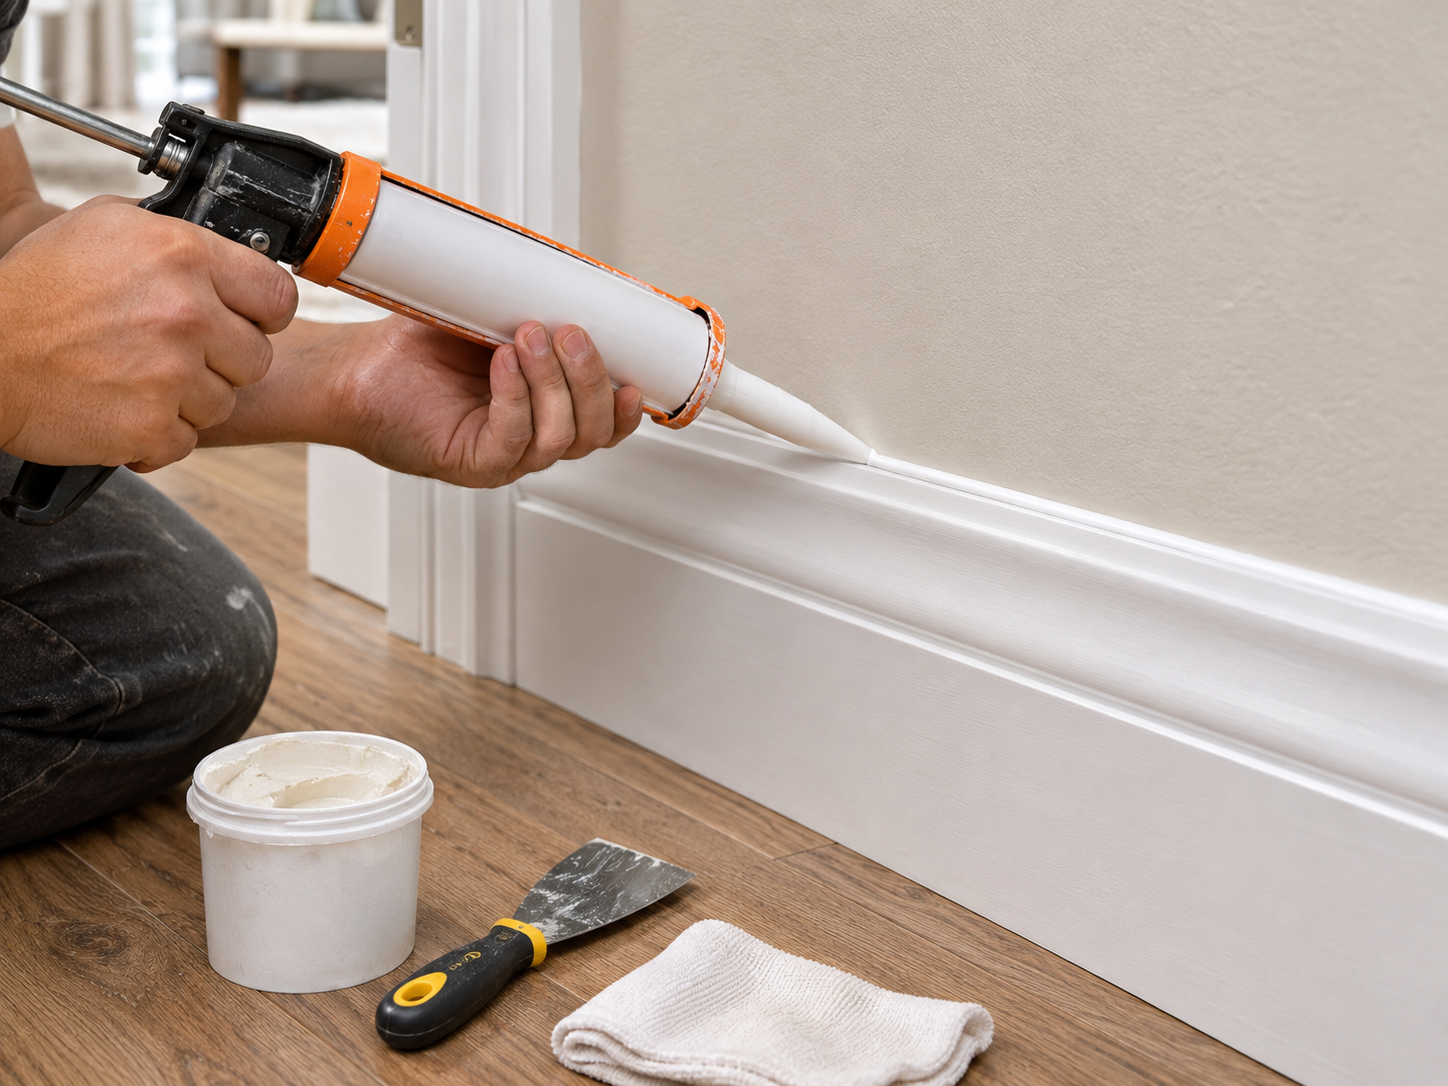
Apply a narrow bead of paintable acrylic-latex caulk where the top of the baseboard meets the wall. Smooth it promptly and remove excess. Caulk is appropriate for small cosmetic gaps, not for hiding large miscuts or an unstable wall connection. Do not use ordinary nonpaintable silicone where you plan to paint.
Prime exposed material and apply trim paint
Prime bare wood, exposed MDF edges and repaired areas where needed. Allow fillers, primers and caulk to dry or cure as specified by their labels before painting. Protect the floor, apply thin even coats and inspect the trim in natural side light for ridges or missed spots.
For more on surface preparation, brushes, primer and clean painted edges, see Builzee’s How to Paint a Room guide.
How should you handle a gap at the floor?
First determine why the gap exists. A slight variation in the floor can sometimes be hidden with an appropriate shoe molding installed to the baseboard or wall, not nailed into floating planks. Wider irregularities may call for scribing the baseboard bottom to the floor profile. Avoid simply filling a continuous gap against floating flooring with caulk; it may restrict movement and can crack or look uneven.
Common Baseboard Installation Mistakes and Fixes
| What goes wrong | Why it happens | Better approach |
|---|---|---|
| Open outside-corner seam | The actual corner angle differs from the assumed 90 degrees, or cuts were made to the short point. | Measure the angle, test on scrap, mark long points and dry-fit both pieces. |
| Gaps at inside corners | Two miters were cut without allowing for an out-of-square corner, or a cope was not fitted fully. | Use a coped joint for profiled trim and fine-tune the backcut. |
| Visible seam along a long wall | A square butt joint is in a prominent location. | Use a well-fitted scarf joint and plan its location with proper backing. |
| Baseboard feels loose | Fasteners missed solid backing or are too short for the wall assembly. | Verify framing and select suitable finish fasteners. |
| Large caulk ridge | Too much sealant was applied to disguise poor fitting. | Correct the fit first; use a small, controlled bead only at the top wall joint. |
| Floating floor binds or buckles | Trim or nails have restricted the floor’s movement. | Fasten trim to the wall and maintain manufacturer-required floor expansion space. |
Before you call the room finished
- Trim meets door casings neatly
- Inside and outside corners are tight
- Long-run joints are aligned
- Nail holes are filled and sanded
- Caulk at the top is thin and even
- Floating flooring is free to move
- Paint is dry and touchups are complete
- Tools, debris and dust are removed
Baseboard Installation FAQs
Do you install baseboards before or after flooring?
For many new floating-floor installations, baseboards go on after the floor so they can conceal its perimeter expansion gap. On other projects, existing baseboards may stay in place and shoe molding may cover the gap. Follow the flooring manufacturer’s installation requirements.
Can you install baseboards without a nail gun?
Yes. A hammer and correctly sized finish nails can work, though setting each nail below the trim surface takes more time. A nail set helps avoid visible hammer marks.
Should I cope or miter inside corners?
For decorative profiles, coping is often preferable because it fits the shape of the adjacent board and can tolerate slight wall-angle variation. For simple square-stock trim, a neat square butt joint can be suitable.
Do you caulk the bottom of baseboards?
Not against floating floors that need to expand and contract. Keep the floor free to move under the trim. Address uneven gaps by checking the trim fit and considering scribing or properly attached shoe molding.
How much extra baseboard should I buy?
About 10% extra is a useful starting allowance for straightforward rooms. Increase the margin when the layout includes many outside corners, short offcuts, unusual angles, or long runs that require joints. Plan cuts by individual board length, not only by total linear feet.
Measure Carefully, Dry-Fit the Corners, Then Fasten
If you take one lesson from this guide, make it this: how to install baseboards successfully is mostly about preparation and fit. Measure the actual wall, test the corner cuts, confirm your fastening points and leave finishing work until the boards are solid and the joints look right. A little extra attention at those stages makes the final caulk and paint much easier.
Additional installation references: This Old House: How to Install Baseboards for more examples of coping and installation methods; U.S. EPA: Lead-Safe Renovations for DIYers for safety considerations in older homes.