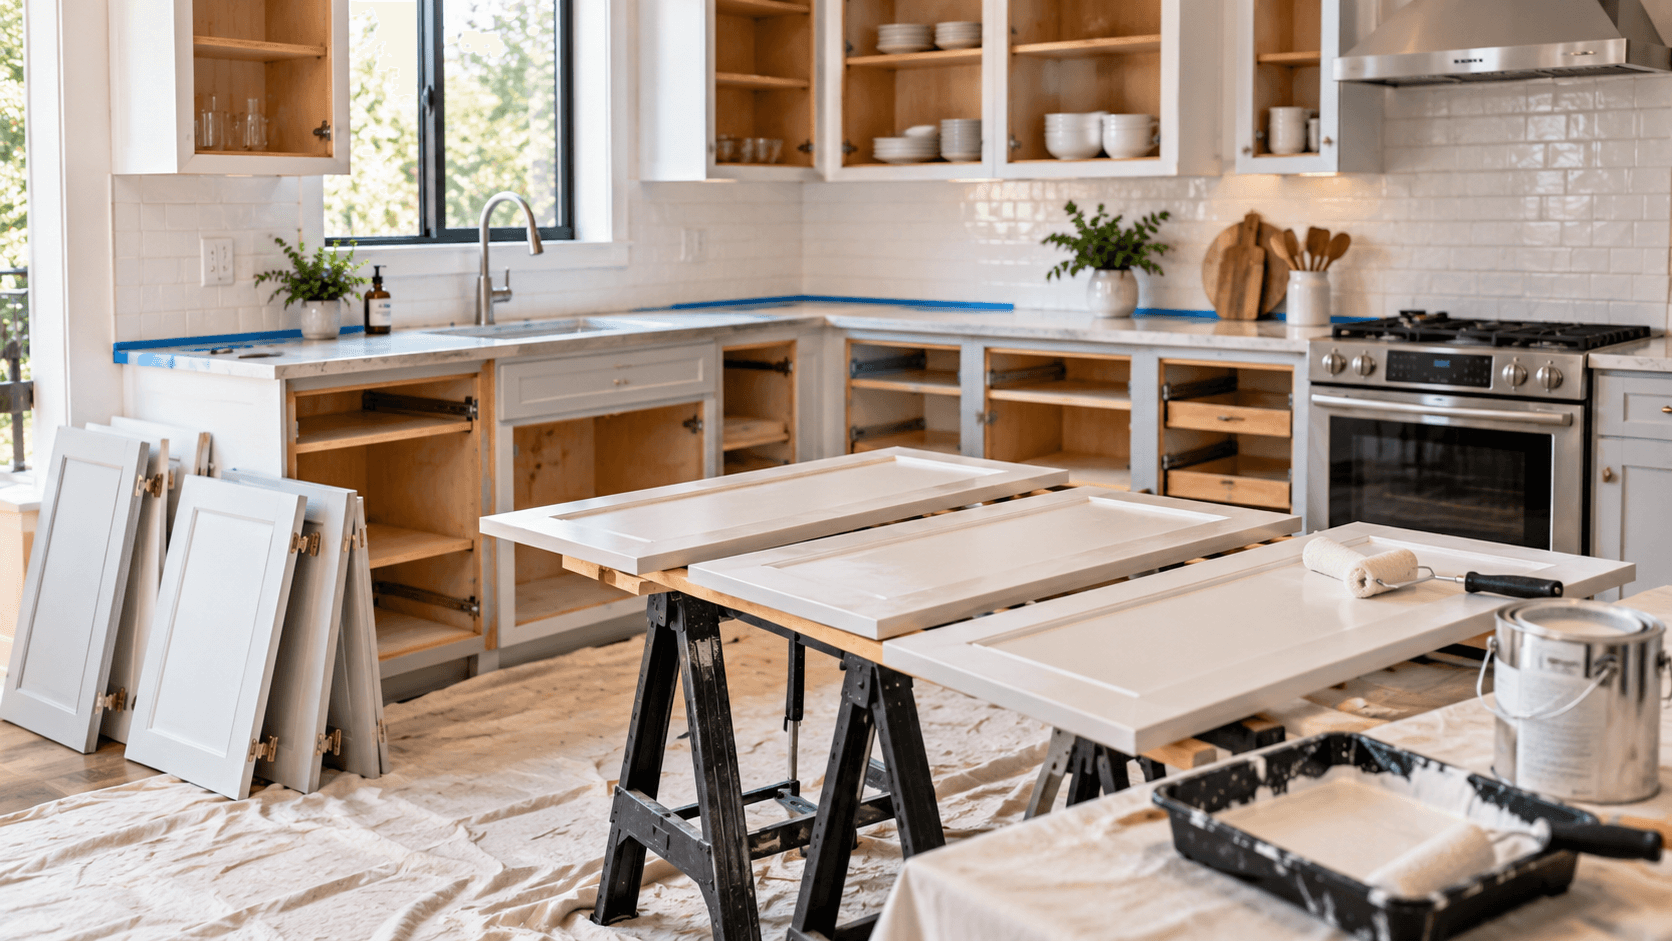
How to Paint Kitchen Cabinets: A Step-by-Step Guide
Learning how to paint kitchen cabinets can seem straightforward until doors start sticking, brush marks show up in the light, or the finish begins chipping around handles a few months later. The painting itself is not usually the hardest part. Most problems come from rushed cleaning, poor surface preparation, the wrong primer or putting the cabinets back into service before the finish has fully cured.
Done carefully, though, painting existing cabinets can change the look of a kitchen without replacing cabinetry that is still in good condition. It can be especially worthwhile when you like the existing layout and storage but want to update the color or finish.
If you are still deciding whether your cabinets are worth keeping, start with Builzee’s Kitchen Cabinets & Storage Guide to compare cabinet construction, materials and storage options before putting time into refinishing them.
Can You Paint Your Existing Kitchen Cabinets?
Many kitchen cabinets can be painted successfully, but the condition and material matter.
Solid wood, wood veneer and paint-grade MDF are generally good candidates when the cabinet boxes and doors are structurally sound. Previously painted cabinets can also be repainted if the existing coating is well bonded.
Laminate and other slick manufactured surfaces can be more difficult. They often require more thorough scuffing and an adhesion primer designed for nonporous surfaces.
Thermofoil deserves extra caution. If the vinyl layer is peeling, bubbling or separating from the substrate, painting over it usually does not solve the underlying problem. Repairing or replacing the affected doors may make more sense.
Before starting, look for:
- Loose hinges or damaged doors
- Swollen cabinet panels from water exposure
- Peeling veneer or thermofoil
- Deep grease contamination near the range
- Failing paint or clear coat
- Cracks around joints
- Worn drawer slides or hinges
Painting can improve the appearance of good cabinets. It cannot fix cabinetry that is coming apart.
If the kitchen needs more than a cosmetic update, the Small Kitchen Remodel Ideas guide also covers layout, storage and appliance decisions that may be worth addressing before refinishing the cabinets.
What You’ll Need
The exact materials depend on the cabinet finish and the paint system you choose, but most projects require:
- Degreasing cleaner
- Clean rags or microfiber cloths
- Screwdriver or drill
- Painter’s tape
- Drop cloths or protective paper
- Wood filler or repair compound
- Sanding sponges or sandpaper
- Vacuum with a brush attachment
- Tack cloth or clean damp cloth
- Bonding or stain-blocking primer
- Cabinet-grade paint
- High-quality brush
- Small smooth-finish roller
- Paint tray
- Caulk for small cabinet-to-wall gaps if needed
- Labels or painter’s tape for numbering doors and drawers
A sprayer is optional. It can produce an excellent finish, but it adds masking, equipment setup, overspray control and cleanup.
How to Paint Kitchen Cabinets Step by Step
The basic process is straightforward, but the order matters. Take your time with preparation, use products suited to the cabinet surface and allow enough drying and curing time between steps.
Step 1: Remove the Doors, Drawer Fronts and Hardware
It is tempting to paint cabinet doors in place to save time. Removing them usually produces a much better result.
Take off doors, drawer fronts when practical, knobs, pulls and hinges that should not be painted. As you work, label everything.
A simple numbering system works well:
- Mark each door or drawer with a number.
- Put the same number inside the corresponding cabinet opening.
- Keep screws and hardware grouped together.
Do not assume every door will fit perfectly in every opening. Small differences in hinge adjustment and cabinet construction can make reinstallation frustrating if everything gets mixed up.
Take a few photos before disassembly as well. They can save time later when you are reinstalling hinges and hardware.
Step 2: Clean the Cabinets Thoroughly
Kitchen cabinets collect more residue than most painted surfaces.
Cooking oils, fingerprints, grease, food residue and cleaning products can remain on surfaces even when the cabinets look clean. Primer and paint do not bond well to contamination.
Pay extra attention to:
- Cabinets near the range
- Areas around handles
- The bottom edge of upper cabinets
- Cabinet doors near the trash pullout
- Panels next to the dishwasher
- Areas around the sink
Use a cleaner appropriate for the existing cabinet finish and follow its instructions. After degreasing, remove any cleaner residue and allow the cabinets to dry completely.
This is one place where cabinet painting differs from ordinary wall painting. For basic wall-painting techniques and room preparation, see How to Paint a Room. Kitchen cabinets need considerably more surface preparation because they are handled and cleaned constantly.
Step 3: Make Repairs Before Sanding
With the doors removed and clean, inspect them under good light.
Fill small dents, unused hardware holes and minor imperfections with a filler that is compatible with the cabinet material and coating system.
If you are changing from knobs to pulls, or changing the spacing of existing pulls, this is also the time to fill old holes and lay out the new hardware locations.
Do not try to bury major damage under paint. Water-swollen MDF, delaminating veneer and broken door joints should be repaired properly or replaced.
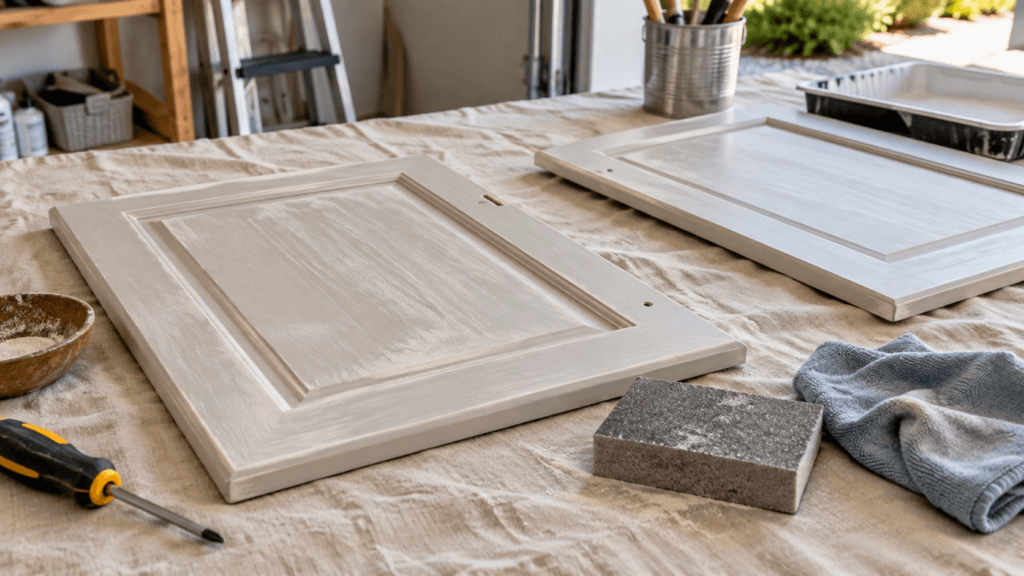
Step 4: Sand or Scuff the Existing Finish
You normally do not need to sand cabinets down to bare wood.
The purpose of sanding is usually to dull the existing finish, smooth repairs and give the primer a better surface to grip.
Use a fine to medium-fine abrasive appropriate for the surface. Work evenly across:
- Door faces
- Door edges
- Drawer fronts
- Face frames
- Exposed cabinet ends
- Trim and molding
Be careful around detailed profiles and sharp edges. Aggressive sanding can round over profiles or cut through thin veneer.
Once sanding is complete, vacuum the surfaces thoroughly and remove the remaining dust.
Do You Have to Sand Cabinets Before Painting?
Sometimes manufacturers advertise primers or paints that can bond with little or no sanding. That does not mean sanding is never useful.
A light scuff sand is inexpensive insurance on many cabinet finishes, especially glossy ones. It also helps reveal dents, old drips and surface imperfections that may otherwise show through the final coat.
If you plan to skip sanding, make sure the primer and paint manufacturer specifically approves that preparation method for the surface you are coating.
One important exception: if you are working on older painted cabinetry and there is any possibility the existing coating contains lead, do not begin sanding until the finish has been evaluated. Disturbing lead-based paint requires appropriate lead-safe procedures.
Step 5: Prime the Cabinets
Primer is one of the most important parts of the job.
The right primer improves adhesion and can prevent stains, wood tannins or previous finishes from affecting the new paint.
The best primer depends on what you are painting.
For example:
- Bare or stained wood may need a stain-blocking primer.
- Slick laminate may need a high-adhesion bonding primer.
- Previously painted cabinets may need a primer compatible with both the old and new coatings.
Apply the primer in thin, even coats. Avoid heavy buildup around inside corners and door profiles.
After the primer dries, inspect it closely. Light sanding between primer and paint can help remove dust nibs, raised grain or small roller marks. Clean away all sanding dust before painting.
Step 6: Choose Paint Made for Cabinets and Trim
Choosing the right products matters when learning how to paint kitchen cabinets because the finish has to withstand considerably more handling and cleaning than a typical painted wall.
Cabinet paint has a harder job than wall paint.
Cabinet doors are touched every day. Drawer fronts get bumped. Areas around handles are repeatedly cleaned. The finish needs to level well and cure into a durable surface.
Look for a high-quality coating intended for cabinets, doors, trim or furniture rather than standard interior wall paint.
Common choices include:
- Waterborne alkyd cabinet paint
- Acrylic enamel
- Urethane-reinforced trim or cabinet coatings
Modern water-based cabinet paints can provide a hard, smooth finish while being easier to work with than older oil-based coatings.
Gloss level is largely a design choice, but satin and semi-gloss finishes are common because they are easier to clean than very flat finishes without looking excessively shiny.
Step 7: Brush, Roll or Spray?
All three methods can work.
Brush
A high-quality brush is useful for:
- Door profiles
- Corners
- Face frames
- Detailed trim
The downside is the possibility of visible brush marks.
Roller
A small smooth-finish roller works well on:
- Flat door panels
- Cabinet sides
- Drawer fronts
- Large face-frame areas
Use a roller designed for smooth surfaces. Heavy-texture rollers can leave an orange-peel finish.
Sprayer
Spraying can produce the smoothest appearance when done correctly. It is especially useful when painting many doors.
The tradeoff is preparation. Spraying requires careful masking, proper ventilation, overspray control and enough space to spray and dry doors without dust or debris settling on them.
For many homeowners, the most practical approach is a combination: brush the profiles and corners, then use a smooth roller on the larger flat surfaces.
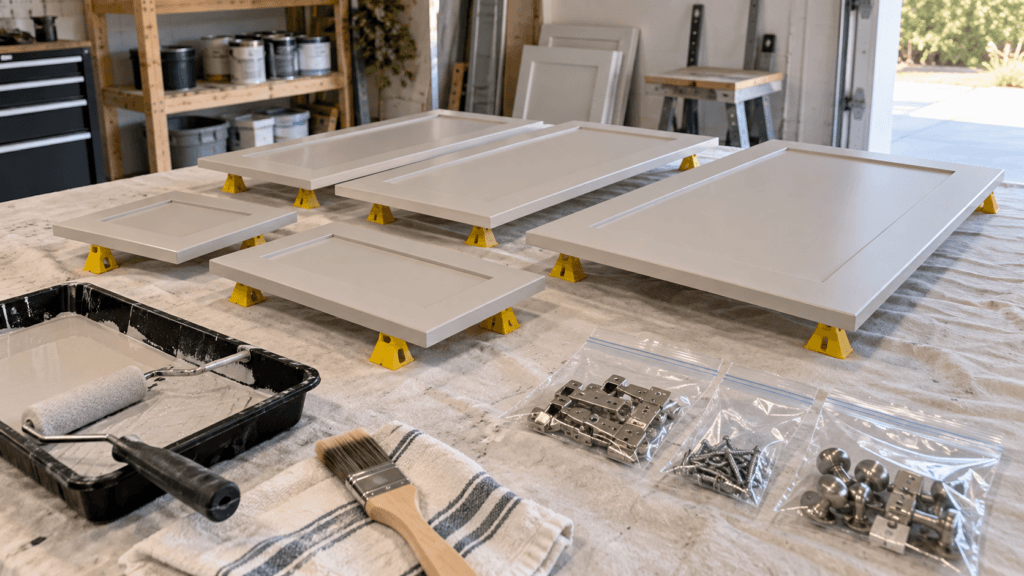
Step 8: Apply Thin Coats
Thick paint does not create a stronger cabinet finish.
Heavy coats are more likely to sag, stay soft longer and collect in door profiles. Several thin coats usually produce a cleaner result.
Follow the coating manufacturer’s recommended recoat time. Temperature, humidity and airflow can all affect drying.
Do not rush the second coat simply because the surface feels dry to the touch.
Lightly sanding between finish coats may improve smoothness if the manufacturer allows it. Use a very fine abrasive and remove every trace of dust before continuing.
Step 9: Let the Paint Cure
Drying and curing are not the same thing.
Paint may feel dry within hours while still being relatively soft underneath. Cabinet coatings often continue hardening for days, and some take considerably longer to reach full durability.
This is why freshly painted doors can stick together or become marked around knobs even when the paint seemed dry during installation.
Follow the manufacturer’s cure guidance and treat the cabinets gently during the first several days.
Avoid aggressive cleaning, slamming doors or placing heavy objects against freshly painted surfaces.
Step 10: Reinstall the Doors and Hardware
Once the finish is ready for handling, reinstall the doors and drawer fronts using the labels you made earlier.
Adjust hinges so the gaps between doors look even. This small step can make a freshly painted kitchen look much more finished.
If you are installing new knobs or pulls, use a hardware jig where possible. Consistent placement matters, particularly across a long run of cabinet doors and drawers.
Remove labels only after you are sure each piece is in the correct location.
Should You Paint Inside the Cabinets?
Usually, no.
If cabinet interiors are clean and in good condition, painting only the exterior surfaces saves considerable time and avoids unnecessary wear problems inside shelves and drawers.
Painting interiors may make sense when:
- The existing interior finish is damaged
- You are changing from a very dark interior to a lighter one
- Open cabinets or glass doors make the interior visible
- You want a complete color change
Keep in mind that shelves receive abrasion from dishes, cookware and pantry items. A painted shelf needs enough cure time before objects are placed back on it.
Common Cabinet Painting Mistakes
Painting Over Grease
Even good primer can struggle when the surface underneath is contaminated.
Skipping Surface Preparation
Paint has a much better chance of lasting when glossy finishes have been properly cleaned and prepared.
Using Wall Paint
Wall paint is designed for a different type of wear. Cabinetry benefits from a harder coating formulated for doors, trim or cabinets.
Applying Paint Too Thickly
Heavy coats increase the chance of drips, soft spots and visible buildup around profiles.
Reinstalling Everything Too Soon
This is one of the easiest ways to damage an otherwise good paint job.
Painting Damaged Cabinets Instead of Repairing Them
Loose joints, swollen panels and peeling surfaces need attention before refinishing.
Losing Track of Doors and Hardware
Labeling everything takes a few minutes and can save a surprising amount of time later.
Is Painting Kitchen Cabinets Worth It?
It can be.
Painting makes the most sense when the cabinet boxes are solid, the layout still works and the main goal is changing the appearance of the kitchen.
It makes less sense when the project is really trying to solve poor storage, failing cabinet boxes or a layout that no longer works.
If the kitchen needs larger changes, compare the cost of refinishing with other upgrades before committing. Builzee’s Kitchen Remodeling Cost & Buying Guide explains where kitchen remodeling costs typically come from and how to compare different levels of work.
For homeowners who are keeping the existing cabinetry, paint can also be combined with relatively small changes such as new hardware, lighting or a backsplash to make the kitchen feel significantly different without replacing everything.
How Long Does It Take to Paint Kitchen Cabinets?
The hands-on work may only take a few days, but the full project usually takes longer because cleaning, drying, sanding, recoating and curing all require time.
The number of doors, cabinet condition, paint system and application method all affect the schedule.
A small kitchen with simple flat-panel doors is very different from a large kitchen with dozens of detailed doors, crown molding and an island.
Give yourself more time than you think you need. Cabinet painting becomes much harder when you are trying to rush doors back into service.
Final Thoughts
Painting kitchen cabinets is one of those projects where patience shows in the finished result.
Clean thoroughly. Repair what needs repairing. Prepare the existing finish properly. Use primer and paint made for the surface, apply thin coats and give the coating enough time to cure.
If the cabinets themselves are still worth keeping, those extra steps can make the difference between a finish that looks good for a few weeks and one that continues to look good through everyday kitchen use.
For more help planning the rest of the room, browse Builzee’s complete Kitchen Guides covering layouts, cabinets, countertops, appliances, installation and remodeling costs.
Planning More Than a Cabinet Paint Project?
Explore Builzee’s complete Kitchen Guides for practical help with cabinet choices, layouts, countertops, appliances, installation and remodeling costs.