
FLOORING INSTALLATION
How Is Flooring Actually Installed?
The installation method can affect how a floor feels, performs and holds up over time. Floating, glue-down, nail-down and tile installations each require different materials, preparation and techniques.
This guide explains the main installation methods, how layout and expansion are handled, and the details that should be planned before the first piece of flooring goes down.

PLAN YOUR MATERIALS
Before installation begins, estimate how much flooring you’ll need. Use the Flooring Quantity Calculator to calculate total floor area, combine multiple rooms and include a waste allowance for cuts and layout.
INSTALLATION METHODS
The Installation Method Depends on the Flooring
Different flooring products are designed to be installed in different ways. The correct method depends on the material, subfloor, room conditions and manufacturer requirements.
FLOATING INSTALLATION
Does the flooring connect without being fastened to the subfloor?
Floating floors lock or join together while remaining independent of the surface below.
Common with:
- Laminate
- Luxury vinyl plank
- Some engineered wood
- Certain hybrid flooring products
- Click-lock systems
Floating floors typically require perimeter expansion space and a flat, stable substrate.
GLUE-DOWN INSTALLATION
Is the flooring bonded directly to the substrate?
Glue-down systems use an approved adhesive to secure the flooring to the prepared surface.
Common with:
- Engineered wood
- Luxury vinyl tile or plank
- Sheet flooring
- Some cork flooring
- Certain commercial flooring systems
Adhesive selection, spread rate, working time and substrate condition are all important to a successful installation.
NAIL-DOWN / STAPLE-DOWN INSTALLATION
Is the flooring mechanically fastened to a wood subfloor?
Nail-down and staple-down installations secure flooring directly to an approved wood substrate.
Common with:
- Solid hardwood
- Engineered hardwood
- Certain tongue-and-groove flooring systems
Fastener type, spacing and subfloor thickness should follow the flooring manufacturer’s requirements.
GOOD TO KNOW
The same flooring category may allow more than one installation method. Always confirm the approved installation method for the specific product before work begins.
TILE INSTALLATION
Tile Uses a Different Installation System
Tile is typically bonded to a properly prepared substrate with mortar rather than installed as a floating or mechanically fastened floor. Substrate movement, mortar coverage, joint spacing and movement accommodation all affect the finished installation.
SETTING TILE
How is tile bonded to the floor?
Tile is typically installed using a compatible mortar over an approved substrate or underlayment.
Key installation details include:
- Using the correct mortar for the tile and substrate
- Selecting the proper trowel notch
- Maintaining adequate mortar coverage
- Keeping tile joints consistent
- Checking alignment as installation progresses
- Avoiding excessive lippage between adjacent tiles
Large-format tile may require additional substrate flatness and installation considerations.
GROUT, MOVEMENT & FINISHING
What happens after the tile is set?
Once the tile and mortar are ready, the installation is completed with grout and required movement joints.
Important details include:
- Using grout appropriate for the joint size and tile
- Cleaning joints before grouting
- Maintaining perimeter movement space
- Using flexible sealant where movement joints are required
- Protecting the installation during curing
- Following mortar and grout cure-time requirements
Grout should not be used as a substitute for movement joints where flexible material is required.
GOOD TO KNOW
Tile is rigid and does not tolerate excessive substrate movement well. Proper preparation beneath the tile is just as important as the tile-setting work itself.
LAYOUT & STARTING POINT
Plan the Layout Before the First Row Goes Down
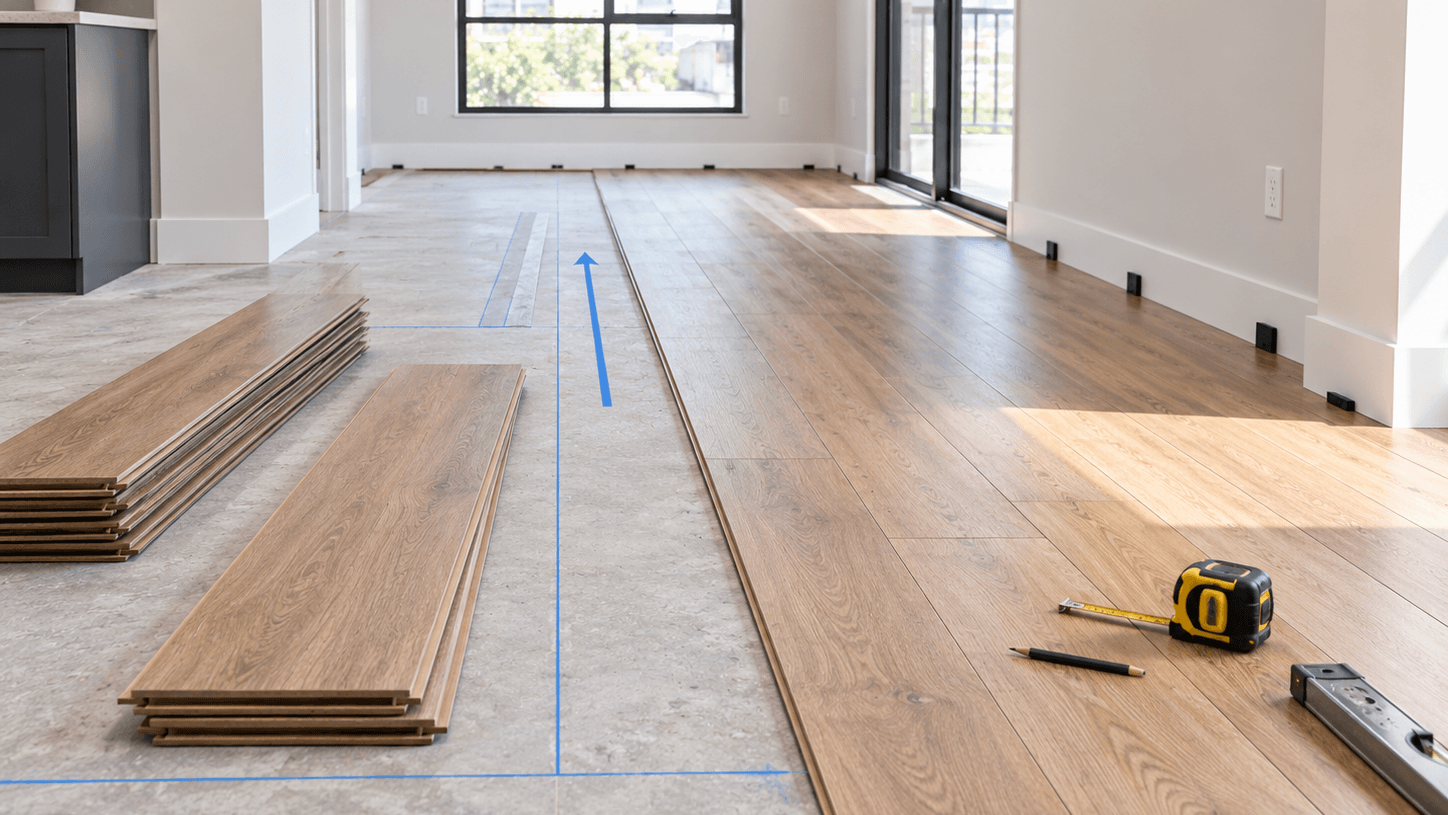
Flooring layout affects how the room looks and how smoothly the installation progresses. Before cutting material, establish the direction, starting point and how the final rows will land at walls, doorways and other fixed conditions.
FLOORING DIRECTION
Which way should the flooring run?
For plank flooring, direction is usually influenced by:
- Room shape
- Main sight lines
- Hallways and adjoining spaces
- Natural light
- Structural or manufacturer requirements
- How multiple rooms connect
Long planks are often run with the length of the room or along the primary sight line, but there is no single direction that works for every space.
STARTING POINT
Where should installation begin?
The first row establishes the alignment for everything that follows.
Before starting:
- Identify the straightest reference wall or control line
- Check whether walls are actually square
- Measure the room at several points
- Plan the width of the first and last rows
- Consider doorways and adjoining rooms
- Snap or mark reference lines where needed
Do not rely on a wall being perfectly straight without checking it first.
BALANCE THE FIRST & LAST ROWS
Avoid starting with a full-width row if it leaves a very narrow strip at the opposite side of the room. Before installation, calculate how the rows will finish and adjust the starting width when necessary. A more balanced layout usually looks better and can make the final cuts easier to install.
GOOD TO KNOW
Layout planning is especially important in open floor plans, hallways and rooms connected without transitions. A small alignment error at the starting point can become much more noticeable as the installation continues.
EXPANSION & CLEARANCE
Leave Room for the Floor to Move
Many flooring materials expand and contract as temperature and humidity change. The installation needs enough clearance around the perimeter and other fixed objects so movement can occur without pushing the flooring together or causing it to buckle.
PERIMETER GAPS
How much space should be left at the walls?
Floating and other movement-sensitive flooring systems typically require clearance around the room perimeter.
Check requirements at:
- Walls
- Baseboards
- Door jambs
- Columns
- Built-in cabinets
- Other fixed surfaces
The required gap varies by flooring product, so use the manufacturer’s specified clearance.
FIXED OBJECTS & OPENINGS
Where else does expansion space matter?
Flooring should not be trapped tightly against objects that prevent natural movement.
Watch for:
- Door frames
- Pipes
- Floor vents
- Fireplace surrounds
- Islands
- Stair posts
- Sliding-door tracks
Trim and molding can usually conceal the required clearance after installation.
LARGE & CONNECTED AREAS
Can the flooring run continuously through multiple rooms?
Large spaces and connected rooms may require additional planning.
Consider:
- Maximum continuous installation dimensions
- Long hallways
- Open floor plans
- Changes in room direction
- Doorway transitions
- Manufacturer-required expansion breaks
Some flooring systems allow long continuous runs, while others require transition or movement joints.
COVER THE GAP, DON’T ELIMINATE IT
Baseboards, shoe molding, transition profiles and other trim are commonly used to cover perimeter gaps after installation. They should conceal the clearance without pinning the flooring so tightly that movement is restricted.
GOOD TO KNOW
Expansion requirements are especially important with floating floors. Too little clearance can contribute to buckling, joint separation or other movement-related problems.
FINISHING DETAILS
Plan the Edges Before You Reach Them
The last few feet of an installation can be some of the most visible. Doorways, transitions, trim and fixed edges should be planned before the flooring reaches them.
DOOR JAMBS
How should flooring fit around door frames?
Whenever possible, flooring should slide cleanly beneath the jamb or casing instead of being cut around it with a visible gap.
Common steps include:
- Checking finished flooring thickness
- Including underlayment in the height
- Undercutting jambs where appropriate
- Leaving required expansion clearance
- Avoiding oversized visible notches
A clean jamb detail can make the installation look much more finished.
TRANSITIONS
How will the flooring meet another surface?
Transitions help manage changes in material, height and movement between adjoining areas.
Common options include:
- T-moldings
- Reducer strips
- Thresholds
- End caps
- Flush transition profiles
- Metal transition strips
Choose the transition based on the flooring type and the height difference between surfaces.
WALLS & FINISHED EDGES
How are perimeter gaps concealed?
Trim usually covers the required clearance around the room after the flooring is installed.
Common finishing options include:
- Baseboards
- Shoe molding
- Quarter round
- End caps
- Edge profiles
- Manufacturer-specific trim pieces
Trim should cover the gap without restricting the flooring’s ability to move.
CHECK THE DETAILS BEFORE FINAL CUTS
Before cutting the last rows or transition pieces, confirm:
- Finished floor height
- Expansion requirements
- Door clearances
- Transition profile dimensions
- Trim thickness
- Adjacent flooring elevations
Small planning errors at edges and openings are often much more noticeable than cuts made in the middle of the room.
GOOD TO KNOW
Do not rely on caulk or oversized trim to hide poor cuts. Clean measurements and planned edge details usually create a better finished result.
COMMON INSTALLATION MISTAKES
Small Installation Errors Can Create Bigger Problems Later
Many flooring failures are not caused by the flooring itself. They come from skipped preparation, poor layout, incorrect spacing or using the wrong installation method.
SKIPPING FINAL PREP
Is the substrate actually ready?
Before installation begins, confirm:
- Moisture conditions are acceptable
- The surface is flat enough
- Damage has been repaired
- Dust and debris are removed
- Required underlayment is in place
Installing over an unprepared surface can create problems that are difficult to correct later.
STARTING WITHOUT A LAYOUT
Have the first and last rows been planned?
Before setting the first piece:
- Measure the room
- Check wall alignment
- Plan plank or tile direction
- Avoid narrow finish rows
- Establish reference lines where needed
A small alignment error at the start can become much more noticeable across the room.
IGNORING EXPANSION CLEARANCE
Is the flooring being installed too tightly?
Watch for flooring pressed against:
- Walls
- Door jambs
- Cabinets
- Columns
- Pipes
- Other fixed objects
Required expansion space should be maintained throughout the installation.
USING THE WRONG INSTALLATION METHOD
Are the correct products and techniques being used?
Always confirm:
- Approved adhesive
- Correct fasteners
- Required underlayment
- Trowel or tool requirements
- Installation pattern
- Manufacturer instructions
Products that look similar may still have very different installation requirements.
PROTECT THE FLOOR AS WORK CONTINUES
New flooring can be damaged before the project is finished.
Protect completed areas from:
- Construction debris
- Heavy tools
- Paint and adhesives
- Rolling equipment
- Moisture
- Other trades working overhead
Use protection materials that are approved for the flooring and avoid trapping moisture beneath coverings.
GOOD TO KNOW
Many installation problems begin before the flooring itself is visibly damaged. Following the product instructions and checking conditions as work progresses can prevent expensive corrections later.
DIY OR PROFESSIONAL?
Some Flooring Is More DIY-Friendly Than Others
The difficulty of flooring installation varies a lot by material and method. A click-lock floating floor may be manageable for an experienced DIYer, while glue-down hardwood, large-format tile or complex layouts can require more specialized tools and technique.
DIY INSTALLATION
When can doing it yourself make sense?
DIY may be reasonable when the project has:
- A simple rectangular room
- A flat, stable subfloor
- Click-lock or floating flooring
- Minimal doorways and transitions
- Straightforward cuts
- Clear manufacturer instructions
- Enough time to work carefully
DIY installation can reduce labor cost, but mistakes in layout, cutting or preparation can offset those savings quickly.
PROFESSIONAL INSTALLATION
When is hiring an installer worth considering?
Professional installation may be a better fit when the project involves:
- Glue-down flooring
- Nail-down hardwood
- Large-format tile
- Complex room layouts
- Multiple connected spaces
- Stairs or detailed transitions
- Significant subfloor correction
- Moisture or structural concerns
An experienced installer can also help identify jobsite conditions that may not be obvious before work begins.
THINK BEYOND THE FLOORING ITSELF
Installation difficulty is not just about placing the flooring.
Also consider whether the project requires:
- Removing existing flooring
- Moving appliances
- Undercutting door jambs
- Cutting around cabinets or fixtures
- Installing transitions and trim
- Grinding or leveling the subfloor
- Working with adhesives or mortar
- Specialized saws or fastening tools
These details often determine whether a project remains manageable as DIY work.
GOOD TO KNOW
If the flooring warranty requires specific installation procedures or documentation, review those requirements before deciding who will perform the work.
BEFORE INSTALLATION
Flooring Installation Checklist
Before installation begins, confirm that the room, flooring and installation details are ready. Most problems are easier to prevent before the first row or tile is installed.
□ Subfloor preparation is complete
□ Moisture requirements have been checked
□ Flooring has been acclimated if required
□ Installation method is confirmed
□ Required adhesive, fasteners or mortar are ready
□ Underlayment or membranes are installed where required
□ Layout direction and starting point are planned
□ First and last rows have been considered
□ Expansion and perimeter clearances are confirmed
□ Door jambs and openings have been planned
□ Transitions and finished floor heights are coordinated
□ Tools and cutting equipment are ready
□ Manufacturer instructions have been reviewed
□ Temperature and humidity are within the required range
□ Protection is available for completed flooring
□ Final measurements have been checked before cutting
Bottom Line
A good flooring installation depends on more than simply fitting pieces together. The installation method, layout, expansion space, edge details and jobsite conditions all affect how the finished floor looks and performs.
Plan the layout before starting, use the installation method approved for the flooring, and follow the manufacturer’s requirements for spacing, adhesives, fasteners and curing. Taking the time to get the details right usually makes the difference between a floor that simply looks finished and one that continues to perform well over time.