
Drywall Repair: Fix Holes, Cracks, and Wall Damage
Drywall repair is not one-size-fits-all. A picture-hook hole may need filler, while a damaged opening needs a supported patch. Learn how to diagnose the problem, select the right technique, reinforce joints and restore the painted finish.
Choose a repair method ↓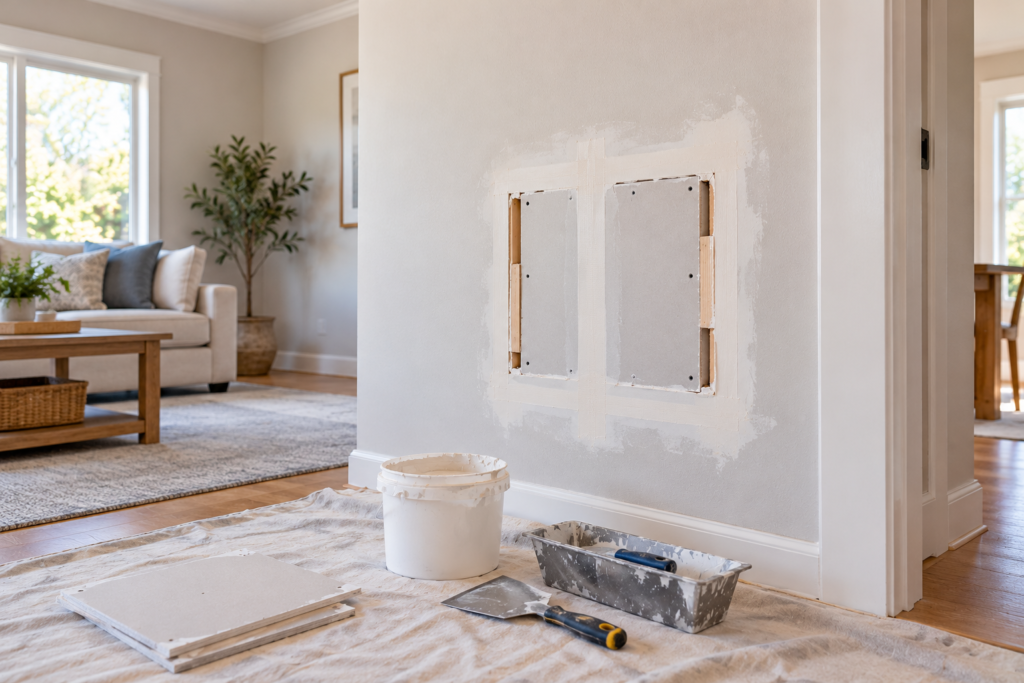 REPAIR GUIDE · 04 / 06
What Kind of Drywall Damage Do You Have?
Before opening a wall, determine whether the damaged surface is solid and dry. Repairing a small impact mark is very different from covering recurring moisture stains, a widening crack or a loose panel.
Surface damage
Nail holes, small screw holes and shallow dents with firm gypsum behind the finish.
USUAL APPROACHFill and smooth with spackle or an appropriate repair compound.
Opening or failed joint
A puncture, missing drywall section, split seam or loose tape with otherwise sound surrounding material.
USUAL APPROACHReinforce or replace the damaged area, then tape and finish the joint.
Moisture or movement
Soft wallboard, recurring bubbling, repeated cracks, brown stains or widespread damage.
FIRST PRIORITYFind and correct the underlying condition before cosmetic work.
Choose the repair method, not just the patch size
| Condition | Typical repair | What makes it work | Watch for |
|---|---|---|---|
| Nail holes & shallow dents | Spackle or suitable joint compound | Sound surface; thin, flush application | Loose paper, sinking filler |
| Small puncture | Reinforced mesh or manufacturer-approved patch system | Overlap solid drywall; feather compound widely | Raised edges visible in side light |
| Medium opening | California patch or replacement piece with backing | Solid perimeter; suitable support for patch size | Flexing, missing backing |
| Large / irregular opening | Cut back to sound drywall; new board on framing or backing | Matching board thickness; supported edges; taped seams | Hidden utilities; unsupported edges |
| Joint crack / loose tape | Remove failed material, correct movement, retape | Reinforced joint and gradual feathering | Recurring movement or moisture |
| Wet or soft wallboard | Fix moisture source; evaluate removal/replacement | Dry, clean, sound assembly before enclosure | Hidden mold or ongoing leaks |
These are repair-selection guidelines, not rigid size limits. A small hole with crumbling edges may need more support than a larger clean opening.
How to Repair Common Drywall Problems
The photos below cover the three most useful situations for homeowners: minor surface damage, a supported replacement patch and an unstable or cracked joint.

Fill Nail Holes, Screw Holes & Dents
For a small, firm area, the goal is to fill the depression without creating a mound that remains visible after painting.
- Remove loose paint, lifted paper and debris. Trim raised edges instead of pushing filler over them.
- Press spackle into the depression using a narrow putty knife, then scrape nearly flush.
- Allow it to dry according to the product directions; add a second thin coat if it shrinks.
- Sand lightly, remove dust and spot-prime before repainting.
Material choice: Spackle is convenient for tiny cosmetic repairs. Larger taped seams generally call for joint compound designed for drywall finishing.
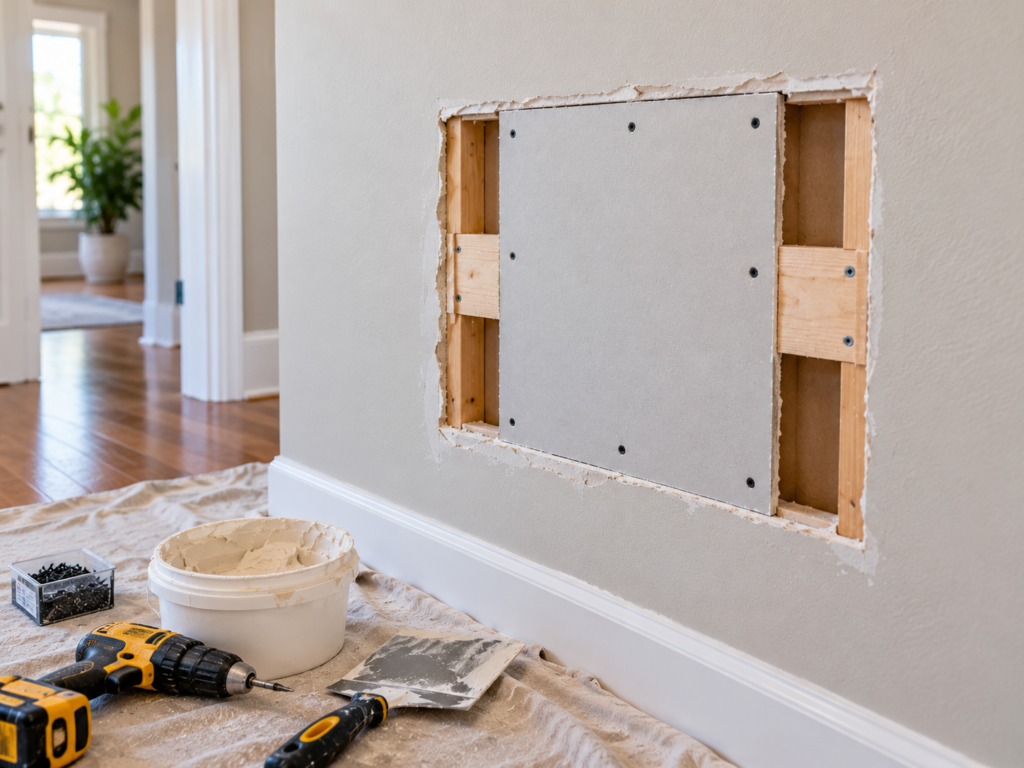
Replace a Damaged Section With a Supported Patch
When a hole is too large or weak for filler or a simple reinforced patch, replace the affected drywall with a properly supported piece.
- Locate framing and concealed services. Cut back only as needed to sound gypsum with manageable, straight edges.
- Add wood or approved backing behind edges that do not land on studs. Secure it to existing sound drywall or framing as appropriate.
- Cut replacement drywall to match the existing thickness and fit it with small, consistent gaps as appropriate for the joint system.
- Fasten without breaking the face paper, then tape seams and feather successive compound coats.
Important: The patch must be rigid. Unsupported edges can flex and crack even when the finish initially looks smooth.

Reinforce Drywall Cracks & Loose Joint Tape
A recurring crack or peeling tape needs more than paint or a smear of compound. Determine whether the joint is moving or wet before reworking it.
- Remove loose, bubbled or poorly bonded tape and compound without unnecessarily tearing sound face paper.
- Investigate and correct movement, loose fasteners or moisture where present.
- Embed fresh paper tape in an even bed of joint compound, or use a compatible mesh-and-compound system following manufacturer instructions.
- Apply additional thin coats across progressively wider areas and finish when completely dry.
Recurring cracks: A widening or repeatedly opening crack can indicate movement requiring evaluation rather than another surface patch.
For a detailed project-by-project walkthrough, see Builzee’s How to Patch a Hole in Drywall tutorial, including California patches, mesh reinforcement and larger openings.
From Visible Patch to Paint-Ready Wall
Good repair work is mostly about transitions. A solid patch can still be obvious when its compound is too thick, its texture does not match or porous filler receives paint without primer.
Embed reinforcement where needed and cover screw heads or shallow defects.
Widen successive coats, let each set or dry as directed and scrape ridges.
Use controlled sanding and match the surrounding wall texture.
Prime porous patches to reduce flashing, then repaint as needed.
Paper tape vs. mesh
Paper tape is thin and is embedded into wet compound. It is widely used at standard joints and corners.
Self-adhesive mesh can simplify positioning for some patches, but often requires a compatible setting-type compound. Follow the tape and compound manufacturer’s instructions.
Why repaired areas flash
New compound absorbs finish paint differently from previously painted drywall. Even a matching color may show a dull or shiny patch.
Seal the repair with an appropriate primer, inspect under side lighting and correct remaining ridges before topcoating. Read How to Paint a Room for broader prep and painting guidance.
When Drywall Should Be Replaced, Not Just Patched
A local impact hole surrounded by firm drywall is usually repairable. But soft, swollen, mold-affected or repeatedly wet material may require removal after the water source is corrected. Do not close a damp cavity simply to restore the surface.
Likewise, large ceiling areas, unknown structural movement, complex fire-rated assemblies, or work around significant electrical/plumbing systems may require qualified trades. Match any required rated assembly rather than assuming ordinary gypsum board is interchangeable.
Not every crack is a structural problem, but a progressively widening diagonal crack, displacement, repeated separation or corresponding exterior distress deserves closer investigation rather than cosmetic concealment.
Drywall Repair Final Inspection Checklist
Use these checks once the repair has cured. Checkboxes are for this page visit and do not save across sessions.
Builzee provides general homeowner education. Follow product instructions and local requirements; consult qualified professionals for hazardous materials, unexplained moisture, structural movement and specialty assemblies.
Choose the Repair That Solves the Problem
Select the repair by the condition of the wall, not just hole dimensions. Keep patches supported, seams reinforced, coats thin and the substrate dry. The final blend and primer often determine whether the repair disappears.