
Window Installation Guide: Flashing, Anchoring & Sealing
Follow the main window installation stages: preparing the opening, sill and head flashing, anchoring and shimming, perimeter air sealing, finishing and quality control.
Explore the guide ↓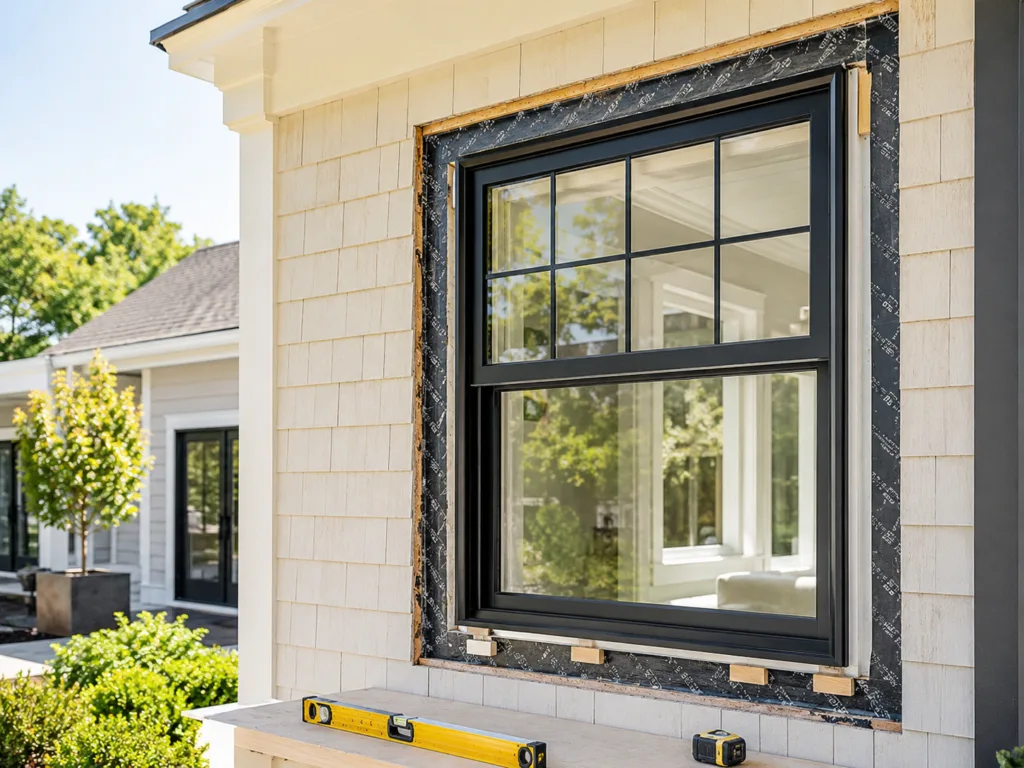
Proper Window Installation Begins With Preparation
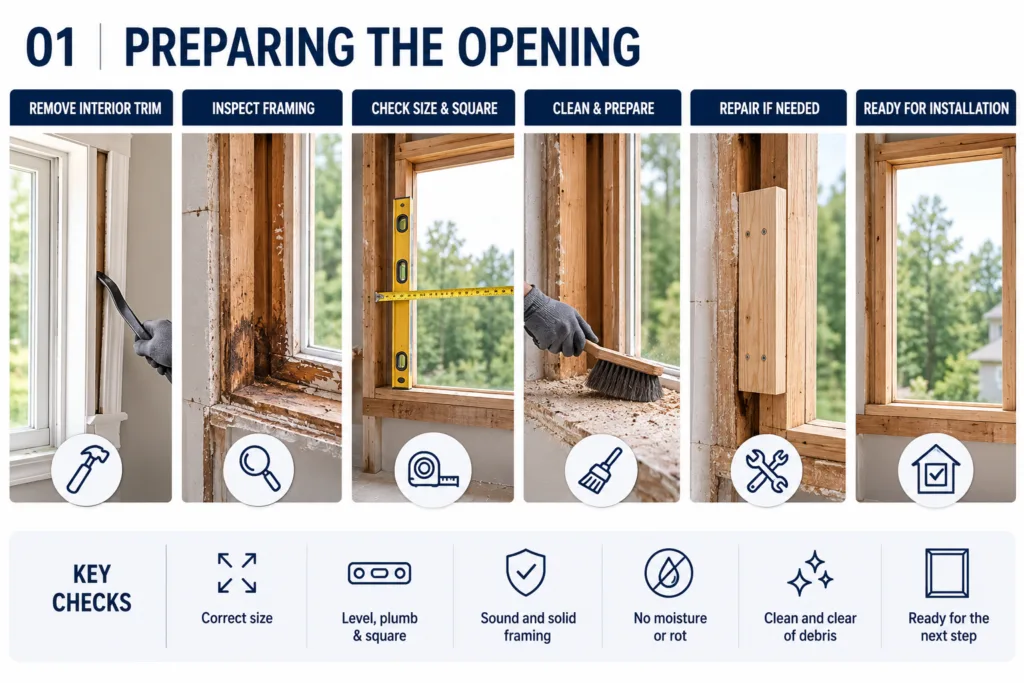
A quality window installation needs the opening to be the correct size, structurally sound, reasonably level and square, and free of concealed deterioration. Correct existing damage before installing the new unit.
Inspect
Check framing, water stains, rot, structural backing, dimensional tolerances and rough opening shape.
Clean and repair
Remove debris, unsuitable old sealants and loose materials; repair compromised substrates.
Confirm system
Verify the window type, fastener pattern, required gaps, flashing components and manufacturer instructions.
Flashing and Waterproofing Details Must Drain Outward
The general concept is to direct rainwater out of the opening: prepare the sill drainage plane, integrate jamb and head flashing, and lap the work into the weather-resistive barrier. Exact sequence changes with the wall, window flange/fin, drainage design and manufacturer details.

A window opening is one of the vulnerable penetrations through the exterior wall. Sill drainage needs to work even when rain reaches behind visible sealant. Flashing must also connect back to the surrounding weather-resistive barrier so water flowing down the wall cannot be directed inward at the head or jambs. These details vary widely between nail-fin, block-frame and other systems.
Setting, Shimming and Anchoring the Window
Position the unit without forcing it into an irregular opening. Support the frame at specified bearing points, maintain level, plumb and square, and fasten into appropriate structure using the manufacturer’s fastening schedule.

Shims support, not distort
Place shims where loads and hardware require support; over-shimming can bow the frame and bind moving sashes.
Fastening must match the product
Anchors, fastener edge distances, corrosion resistance and substrate capacity depend on system and wind requirements.
Alignment should be checked before final tightening and again after the unit is fastened. Over-tightening a screw or adding excessive shims may pull the jamb out of plane, even when the glass initially appears level. Test all operators, latches and locking points while there is still access to the anchorage.
Perimeter Insulation and Air Sealing
The rough-opening gap often contains an insulation layer and a designated interior or exterior air/weather seal. Use compatible sealants and low-expansion foam where appropriate without displacing the frame or blocking drainage. The interior air barrier and exterior rain-control strategy must work together.

Exterior and Interior Finishing
Restore cladding, flashing interfaces, casing and wall finishes without burying designated drainage openings. Check accessory and screen fit. Complete a clean, usable, weathertight installation rather than stopping once the window is fastened.

Exterior
Maintain cladding clearances, lapped weather barriers, finished sealant joints and drainage provisions.
Interior
Restore insulation, trim, drywall and paint; ensure operating hardware is accessible.
Common Window Installation Mistakes
The original guide identified seven avoidable problems: missing or incorrect flashing, over-shimming, inappropriate fasteners, distorted frames, blocked drainage, poor perimeter sealing and failure to test window operation. Several are difficult to detect after interior or exterior trim is installed.
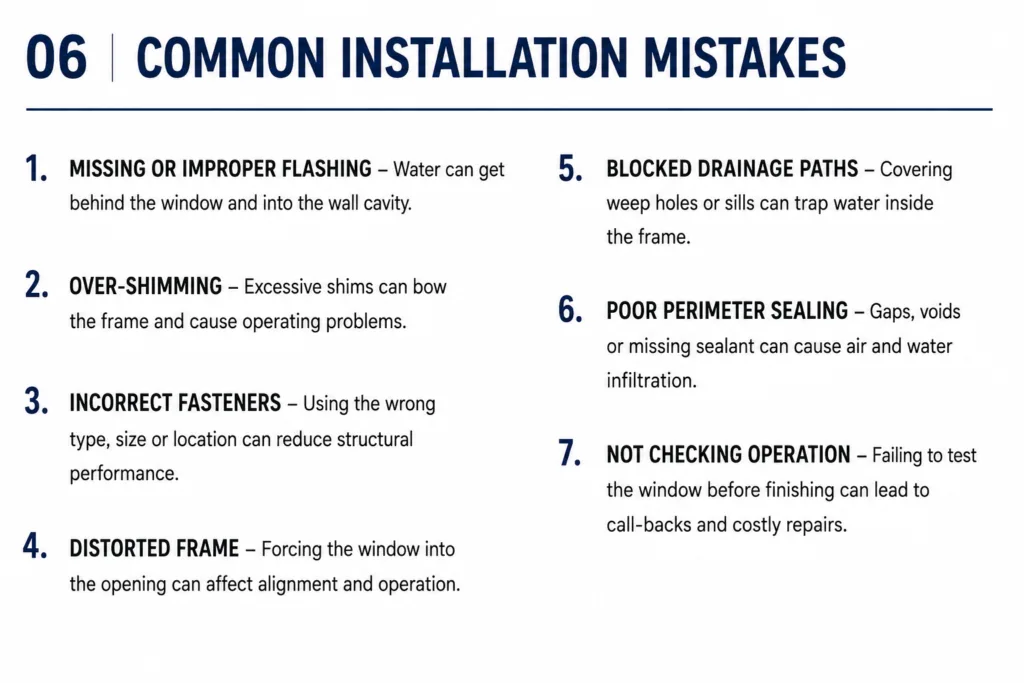
Make a final inspection before concealment. Confirm the sill and flashing details, locations and types of fasteners, frame alignment, joint seal continuity and that all expected drainage routes remain open. Photograph concealed details when appropriate for future warranty or maintenance questions.
Window Installation Quality Checklist
During closeout, do not limit inspection to aesthetics. Operate each sash more than once, verify locks and screens, examine the exposed seals, confirm required weeps are open and verify that disturbed finishes have been restored. When special inspection or water testing is part of the contract, document those results too.