
WINDOW INSTALLATION GUIDE
How Should a Window Actually Be Installed?
Learn the basics of window installation, from preparing the opening and setting the window to flashing, fastening, sealing and avoiding common mistakes.
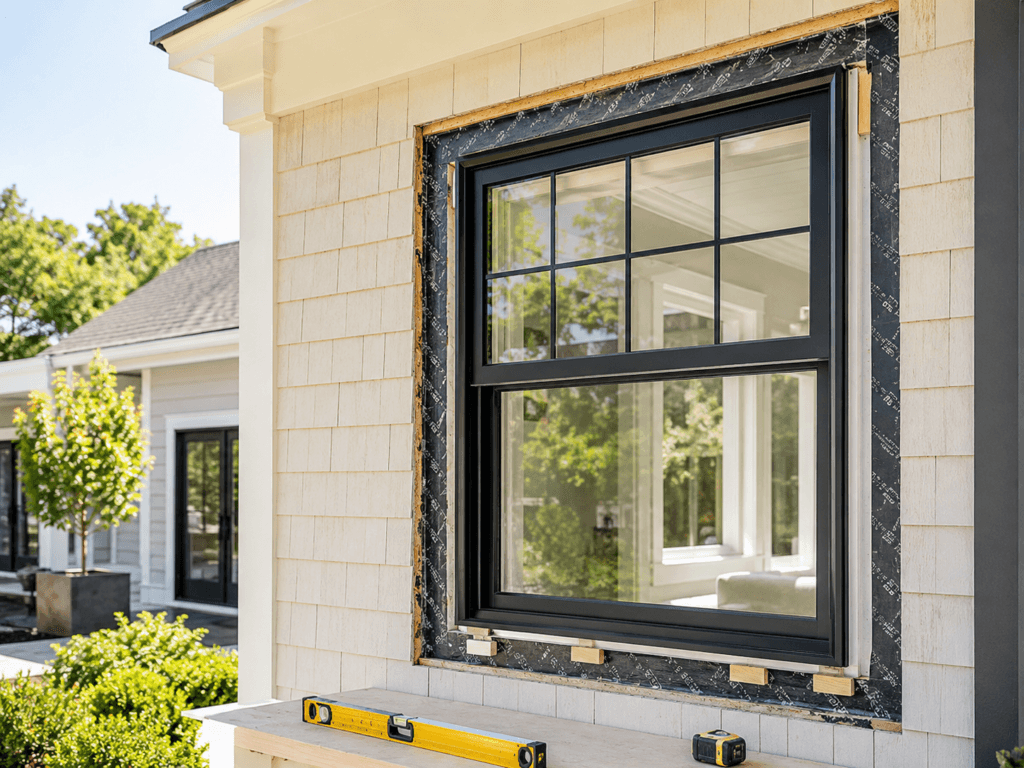
WINDOW INSTALLATION
Understand What Makes a Window Installation Work
A good window installation manages water, air and structural loads while allowing the window to operate as designed. The exact method varies by wall construction, window type and project conditions, but the basic principles remain the same.
01 – PREPARING THE OPENING
A quality window installation starts with a properly prepared opening. The rough opening should be checked for size, level, plumb, square, structural condition and any signs of moisture or damage before the new window is installed.
BEST FOR
Any replacement or new-construction window installation where proper fit, fastening, flashing and long-term performance depend on the condition of the opening.
GOOD TO KNOW
The opening should be clean, sound and large enough to allow the window to be positioned and adjusted without forcing the frame. Damaged framing, uneven surfaces, old sealant, water intrusion or deteriorated materials should be corrected before installation continues.

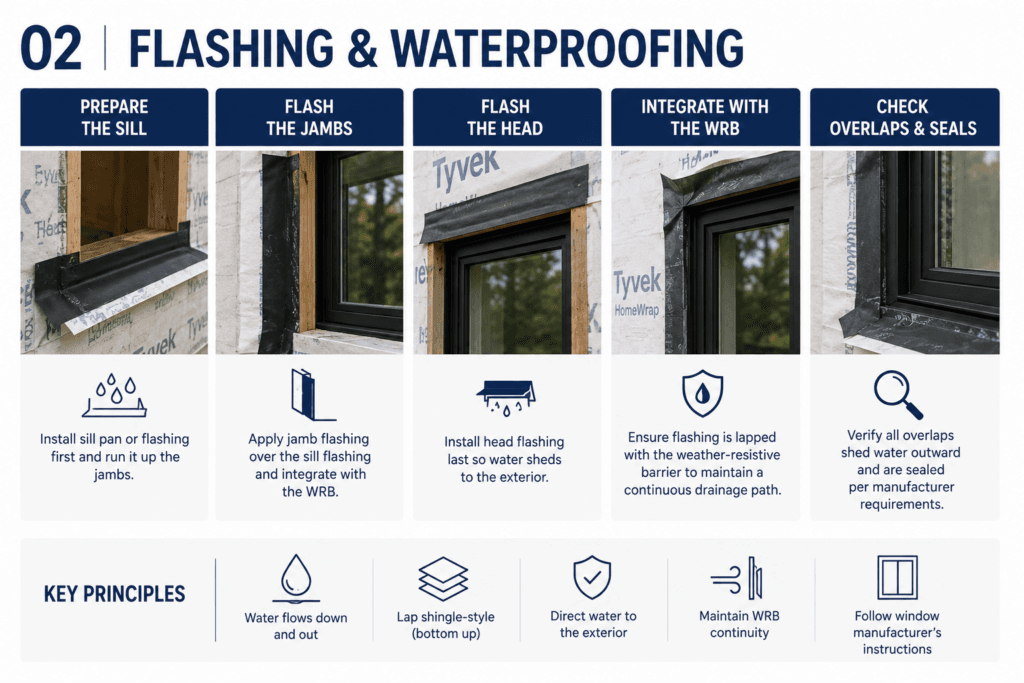
02 – FLASHING & WATERPROOFING
Flashing and waterproofing help direct rain and moisture away from the window opening and back to the exterior. A properly detailed installation should manage water around the sill, jambs and head while integrating with the surrounding weather-resistive barrier.
BEST FOR
Any exterior window installation where long-term protection from water intrusion and moisture damage is important.
GOOD TO KNOW
Flashing should be installed so water can drain outward rather than become trapped behind the window. The sill is typically prepared first, followed by the jambs and head, with materials layered in a way that sheds water downward. The exact flashing method depends on the window type, wall construction and manufacturer’s installation requirements.
03 – SETTING & ANCHORING THE WINDOW
Once the opening is prepared and flashed, the window is positioned in the opening, adjusted for level, plumb and square, then secured to the surrounding structure. Proper setting and anchoring help the window operate correctly and resist wind and other loads.
BEST FOR
Any window installation where proper alignment, fastening and structural attachment are necessary for long-term operation and performance.
GOOD TO KNOW
The frame should not be forced or distorted during installation. Shims are typically placed at key fastening and support points, and anchors or screws should be installed according to the window manufacturer’s requirements. Before final tightening, confirm that the window remains level, plumb and square and that all operable sash or panels move and lock properly.


04 – AIR SEALING & INSULATION
After the window is secured, the gap between the window frame and the rough opening should be sealed and insulated to help control air leakage and heat transfer. This perimeter joint is an important part of the overall window performance.
BEST FOR
Any window installation where comfort, energy efficiency and protection from drafts depend on properly sealing the space around the frame.
GOOD TO KNOW
The perimeter gap should be filled with materials that insulate without distorting the window frame. Low-expansion window and door foam, backer rod and sealant are commonly used depending on the joint size and installation condition. Avoid overfilling the cavity, and make sure interior and exterior seals are detailed so moisture is not trapped around the window.
Before sealing the perimeter, use the Sealant Calculator to estimate the number of cartridges or sausages needed based on joint width, depth and total joint length.
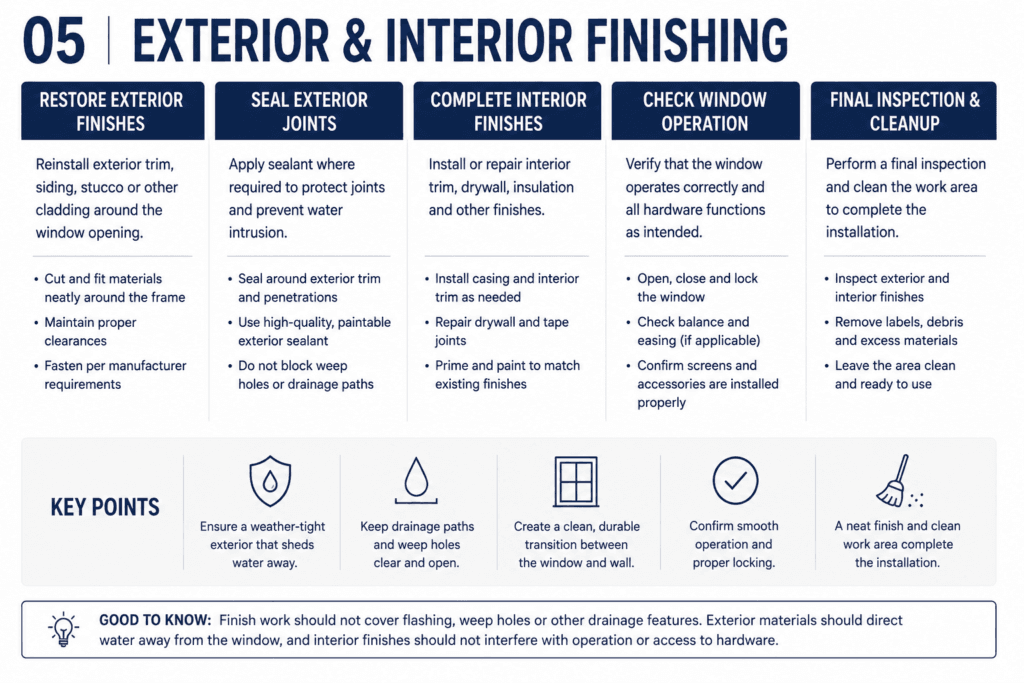
05 – EXTERIOR & INTERIOR FINISHING
After the window is installed and sealed, the surrounding finishes are restored to complete the opening. This may include exterior trim, siding, stucco or sealant work, along with interior casing, drywall, paint or other finish repairs.
BEST FOR
Any window installation where the finished appearance, weather protection and transition between the new window and surrounding wall materials need to be completed properly.
GOOD TO KNOW
Finish work should not cover drainage paths, flashing details or weep locations that are intended to remain open. Exterior materials should shed water away from the window, while interior trim and finishes should fit cleanly without restricting window operation or access to hardware.
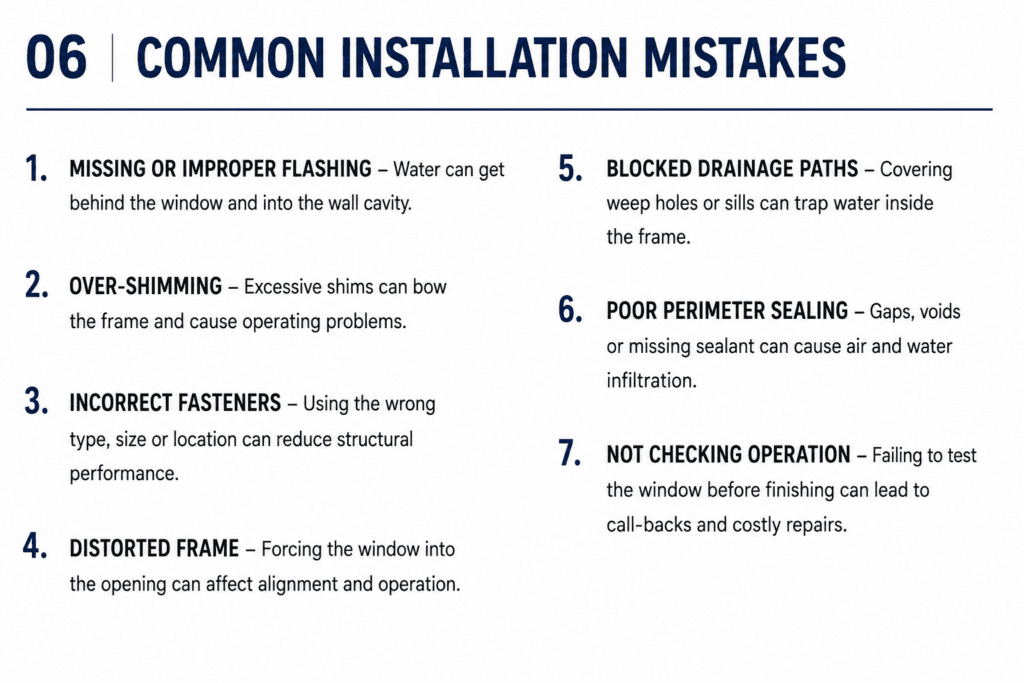
06 – COMMON INSTALLATION MISTAKES
Even a good window can perform poorly if it is installed incorrectly. Common problems include improper flashing, over-shimming, incorrect fasteners, distorted frames, blocked drainage paths, poor perimeter sealing and failing to verify operation before the installation is finished.
BEST FOR
Homeowners who want to recognize installation problems that can lead to leaks, drafts, difficult operation, premature wear or reduced energy performance.
GOOD TO KNOW
Many installation problems are difficult to correct once trim and finishes are complete. Before closeout, verify that the window is level, plumb and square, operates and locks properly, drains as designed, is securely anchored and has continuous flashing, insulation and perimeter seals appropriate for the installation.
QUICK COMPARISON
Window Installation Checklist at a Glance
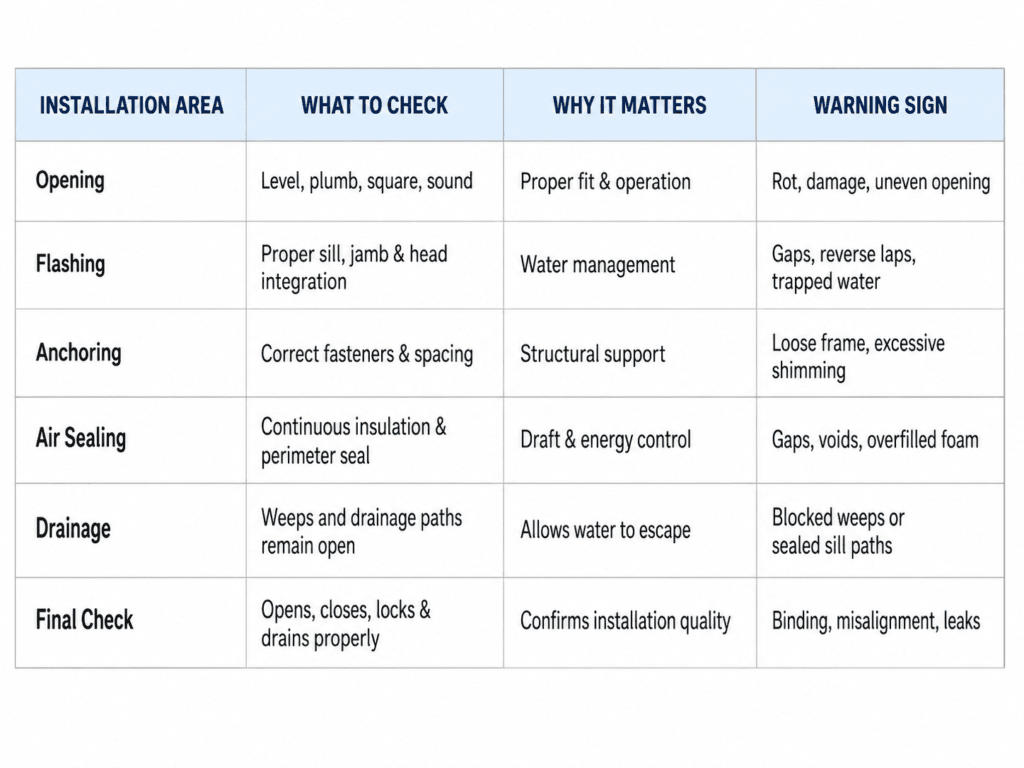
Installation information is provided for general guidance only. Actual installation requirements vary by window manufacturer, product type, wall construction, climate, local building codes and project conditions. Always follow the window manufacturer’s installation instructions and applicable code requirements.