
ROOF INSTALLATION
Understand How a Roof Is Installed From Start to Finish
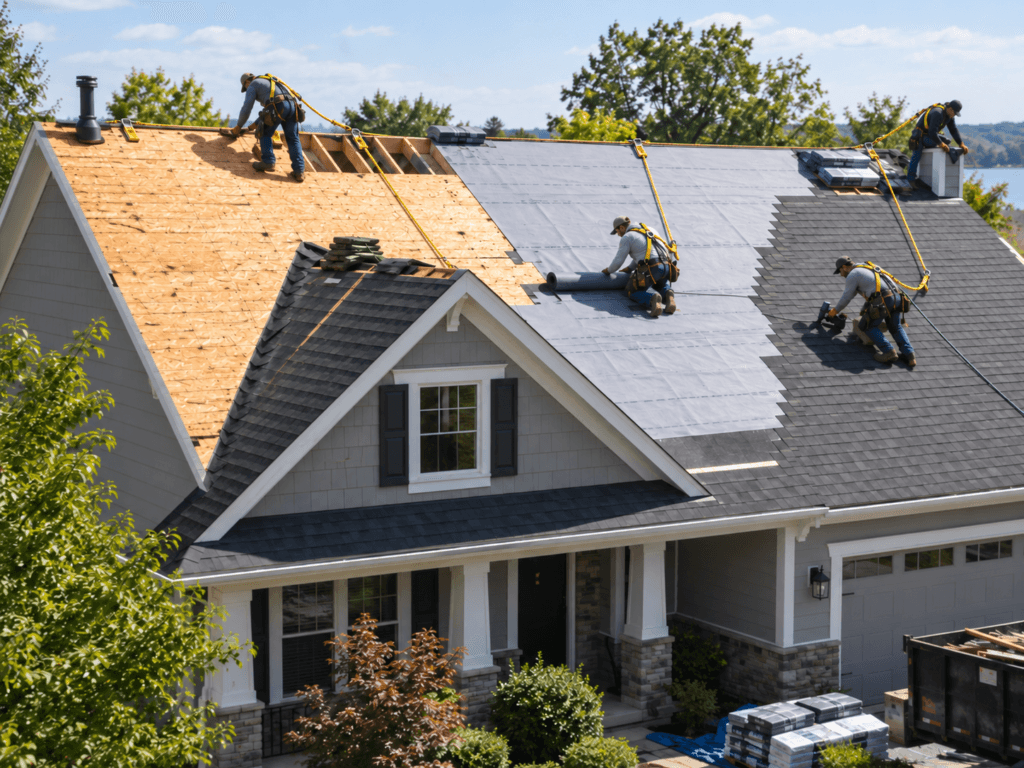
A quality roof installation depends on much more than laying shingles or panels. Tear-off, deck preparation, underlayment, flashing, ventilation, edge details and final inspection all affect how the finished roof performs. This guide walks through the typical installation sequence so you know what should happen at each stage.
PLAN YOUR MATERIALS
Before installation begins, estimate the amount of roofing material the project may require. Use the Roofing Material Calculator to calculate roof surface area, roofing squares, waste and approximate material quantities based on roof dimensions and pitch.
BEFORE INSTALLATION
Prepare the Roof Before New Materials Go Down
A successful roof installation starts with understanding the existing conditions. Before new roofing is installed, the old materials need to be removed or evaluated, the deck inspected, and any damaged areas identified so the new system has a sound base.
01 — TEAR-OFF
Tear-off removes the existing roof covering so the deck, flashing and concealed conditions can be inspected. On many replacement projects, this is when damaged sheathing, old repairs or hidden moisture problems are first discovered.
WATCH FOR
- Multiple existing roof layers
- Rotted or soft decking
- Deteriorated flashing
- Water-stained sheathing
- Debris left on the roof deck
02 — PROTECT THE PROPERTY
Roof replacement creates debris, nails and heavy material movement around the home. Landscaping, windows, siding, driveways and exterior equipment should be protected before work begins.
WATCH FOR
- Unprotected landscaping
- Debris falling near windows or doors
- Poorly positioned dumpsters
- Loose nails around walkways and driveways
- Materials stored where they can damage finishes
03 — VERIFY EXISTING CONDITIONS
Before installation proceeds, the contractor should confirm roof geometry, penetrations, ventilation, drainage and any areas that require repair or special detailing.
WATCH FOR
- Sagging or uneven roof planes
- Damaged fascia or eaves
- Chimney or wall transitions
- Existing skylights and vents
- Areas where water has collected or leaked
GOOD TO KNOW
Roof replacement estimates often include an allowance for a limited amount of deck repair, with additional damaged sheathing priced separately. Ask how concealed damage will be documented and approved before extra work is performed.
ROOF DECK INSPECTION
Make Sure the Roof Deck Is Sound Before Covering It
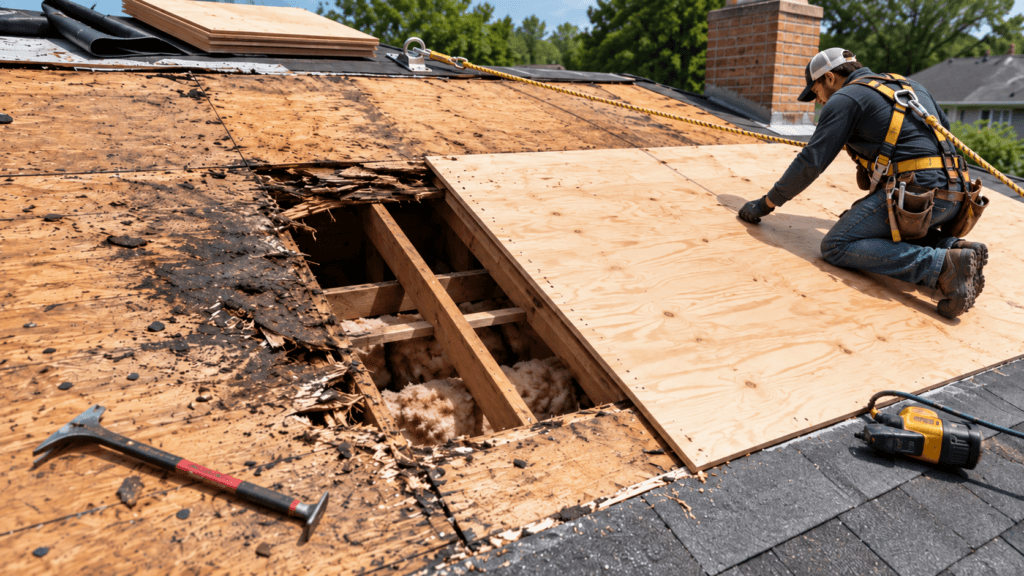
Once the old roofing is removed, the roof deck can finally be inspected directly. The deck needs to be dry, reasonably flat and strong enough to hold fasteners securely before underlayment and new roofing materials are installed.
DECK CONDITION
Plywood, OSB or plank decking can deteriorate from leaks, trapped moisture, age or previous poor repairs. Damaged areas should be replaced before the new roofing system covers them.
WATCH FOR
- Soft or spongy areas
- Rot or delamination
- Cracked or broken panels
- Water staining
- Large gaps or unsupported panel edges
- Fasteners that no longer hold securely
REPAIR & REPLACEMENT
Deck repairs may involve replacing individual panels, sections of plank decking or reinforcing areas where the existing substrate is no longer suitable. Any new sheathing should match the required thickness and be properly supported and fastened.
WATCH FOR
- Patchwork repairs with unsupported edges
- Sheathing that is too thin
- Uneven transitions between old and new decking
- Damaged framing beneath the deck
- Repairs concealed before they are documented
GOOD TO KNOW
The roof deck is usually hidden once the installation is complete, so this is one of the most important stages to photograph. If damaged decking is found, ask for photos before and after repairs so you know what was replaced.
UNDERLAYMENT & WATER PROTECTION
Add a Secondary Layer of Protection Above the Roof Deck
Once the decking is repaired and ready, underlayment and water-resistant membranes are installed before the finished roofing material. These layers help protect the roof deck from moisture that gets past the outer roof covering.
01 — SYNTHETIC UNDERLAYMENT
Synthetic underlayment is commonly used beneath asphalt shingles and other steep-slope roofing materials. It provides a lightweight, durable layer between the roof deck and finished roof covering.
WATCH FOR
- Torn or wrinkled material
- Improper overlaps
- Loose fasteners
- Areas left exposed longer than the product allows
- Gaps around penetrations or roof transitions
02 — SELF-ADHERED MEMBRANES
Self-adhered waterproof membranes are often used in more vulnerable areas, such as valleys, eaves, around penetrations and other locations where water backup or concentrated runoff may occur. These membranes bond directly to the roof deck and provide additional protection beneath the roofing system.
WATCH FOR
- Poor adhesion
- Wrinkles or trapped debris
- Incomplete coverage at vulnerable areas
- Improper laps or terminations
03 — FLASHING INTEGRATION
Underlayment and flashing should be installed in the correct sequence so each upper layer overlaps the layer below it and directs water toward the exterior. This sequencing is especially important around chimneys, walls, skylights, valleys and roof penetrations.
WATCH FOR
- Reverse laps
- Flashing installed over materials that should overlap it
- Exposed deck at transitions
- Heavy reliance on sealant instead of layered waterproofing
GOOD TO KNOW
Roofing materials are designed to shed water in layers. Each course, membrane and flashing component should overlap the one below it so gravity continually moves water toward the exterior. A waterproofing detail that depends primarily on caulk or roofing cement is usually more vulnerable over time.
FLASHING & ROOF EDGES
Detail the Areas Where Water Is Most Likely to Cause Problems
Roof transitions and edges require special attention because they interrupt the normal flow of water across the roofing surface. Flashing, valleys and perimeter metals should be integrated with the underlayment and roof covering so runoff continues toward the exterior.
01 — FLASHING
Flashing protects joints where the roof meets chimneys, walls, skylights and other surfaces. Depending on the location, this may include step flashing, counterflashing, apron flashing and other formed metal pieces. Proper flashing should be layered with the roofing material rather than simply sealed over the top.
WATCH FOR
- Missing or reused damaged flashing
- Reverse laps
- Exposed fasteners in vulnerable locations
- Large amounts of roofing cement or sealant
- Gaps where flashing meets walls or masonry
02 — VALLEYS
Valleys carry concentrated runoff where two roof planes meet. They may use an exposed metal valley or a shingle-covered system depending on the roof design and roofing material. Water needs a clear, uninterrupted path through the valley and toward the eave.
WATCH FOR
- Fasteners too close to the valley center
- Poorly cut or uneven shingle edges
- Wrinkled membrane beneath the valley
- Debris that restricts drainage
- Improper transitions where the valley reaches the eave
03 — DRIP EDGE & PERIMETER METAL
Drip edge is installed along eaves and rakes to protect the edge of the roof deck and help direct runoff away from fascia and into the gutter system. Its relationship with the underlayment can vary by location and roofing requirements, but the materials should always be layered so water cannot easily reach the exposed deck edge.
WATCH FOR
- Missing drip edge
- Bent or poorly secured metal
- Large gaps at joints
- Roofing that terminates too far behind the edge
- Water running behind the gutter or fascia
GOOD TO KNOW
These details are difficult to correct once the finished roofing is installed. Flashing and perimeter work should be completed as part of the roofing system rather than treated as an afterthought or covered with sealant later.
ROOF COVERING INSTALLATION
Install the Finished Roofing System Correctly
Once the deck, underlayment and flashing are complete, the finished roofing material is installed. The exact process varies by product, but the same principles still apply: proper fastening, correct overlaps, clean transitions and manufacturer-approved details.
01 — ASPHALT SHINGLES
Asphalt shingles are installed in overlapping courses from the lower roof edge upward. Starter strips, field shingles and ridge caps all work together to create a continuous water-shedding surface.
WATCH FOR
- Improper nail placement
- Too few or too many fasteners
- Misaligned courses
- Missing starter strips
- Poorly finished valleys or ridges
02 — METAL ROOFING
Metal roofing may use standing-seam panels, exposed-fastener panels or metal shingles. Panel alignment, clip placement, seam engagement and expansion details are especially important.
WATCH FOR
- Uneven seams
- Improper fastener placement
- Scratched coatings
- Poorly detailed penetrations
- Panels installed without proper allowance for movement
03 — TILE & SLATE
Tile and slate systems rely on overlapping individual pieces installed over an underlayment system. Fastening methods vary by material, roof slope and local requirements.
WATCH FOR
- Cracked or improperly supported pieces
- Insufficient overlap (headlap)
- Poorly aligned courses
- Excessive walking damage
- Improper fastening around hips, ridges or valleys
04 — LOW-SLOPE SYSTEMS
Low-slope roofs typically use membrane-based systems rather than conventional shingles. Seams, penetrations, perimeter details and drainage are critical because water moves off the roof more slowly.
WATCH FOR
- Poorly welded or adhered seams
- Wrinkles or fishmouths
- Ponding water
- Improperly flashed penetrations
- Weak perimeter terminations
GOOD TO KNOW
Roofing materials should be installed according to the specific manufacturer’s instructions and the requirements for that roof slope and system. Two products that look similar may still have different fastening, overlap or flashing requirements.
PENETRATIONS & FINAL DETAILS
Finish the Openings and Transitions Carefully
Roof penetrations interrupt the finished roof surface, so each opening needs a detail that sheds water correctly and remains serviceable over time. This is also when ridge caps, vents and other finishing components are completed.
01 — PLUMBING VENTS & PIPE BOOTS
Plumbing vent pipes usually pass through a flashing boot that seals the opening while allowing the pipe to extend above the roof.
WATCH FOR
- Cracked or poorly seated boots
- Exposed fasteners
- Loose flashing
- Gaps around the pipe
- Sealant being used as the primary waterproofing method
02 — RIDGE & ATTIC VENTS
Ridge vents, box vents and other exhaust components should be installed so they remain weather-resistant while allowing attic air to escape.
WATCH FOR
- Blocked vent openings
- Poorly cut vent slots
- Loose ridge caps
- Improper flashing
- Exhaust vents added without adequate intake ventilation
03 — CHIMNEYS, SKYLIGHTS & OTHER OPENINGS
Larger penetrations require more complex flashing because water has to be redirected around several sides before returning to the roof surface below.
WATCH FOR
- Missing step or counterflashing
- Poorly finished uphill transitions
- Debris trapped behind the opening
- Large exposed sealant joints
- Flashing that does not properly overlap surrounding materials
GOOD TO KNOW
The best roof details rely on overlapping materials and proper flashing geometry first, with sealant used only where appropriate. A penetration that depends heavily on exposed caulk is usually more vulnerable as the roof ages.
FINAL INSPECTION & CLEANUP
Check the Finished Roof Before the Job Is Complete
A roof installation should end with more than removing ladders and hauling away debris. The finished roof, flashing, penetrations, ventilation and surrounding property should all be reviewed before the project is considered complete.
FINAL ROOF INSPECTION
The completed roof should be checked for consistent installation, secure materials and properly finished transitions.
CHECK FOR
- Straight, consistent shingle or panel courses
- Secure ridge and hip caps
- Properly finished valleys
- Flashing completed at walls, chimneys and penetrations
- Vent openings clear and properly installed
- No exposed or misplaced fasteners
- Damaged materials replaced before completion
PROPERTY CLEANUP
Roof replacement can leave behind nails, small debris and material scraps around the home. A thorough cleanup protects landscaping, vehicles and people using the property.
CHECK FOR
- Roof debris removed from gutters and ground areas
- Magnetic nail sweeps around driveways, walkways and landscaping where appropriate
- Landscaping and exterior finishes checked for damage
- Gutters and downspouts left clear
- Leftover materials removed or neatly stored
- Dumpsters and protection removed without property damage
GOOD TO KNOW
Before final payment, it is reasonable to walk the property with the contractor and review the completed work. Ask about any details you do not understand and keep photos, warranties, product information and the final invoice with your home records.
FINAL CHECK
Roof Installation Checklist
Before signing off on a new roof or replacement project, confirm that the major installation steps and details have been completed properly.
□ Existing roofing was removed or evaluated as planned
□ Roof decking was inspected before being covered
□ Damaged sheathing was repaired or replaced
□ Underlayment was installed with proper overlaps
□ Vulnerable areas received appropriate water-resistant membrane
□ Valleys and roof edges were detailed correctly
□ Flashing was installed at walls, chimneys and other transitions
□ Roofing materials were installed with correct fastening and alignment
□ Plumbing vents, skylights and other penetrations were properly flashed
□ Ridge, hip and ventilation components were completed
□ Gutters and roof edges direct water away properly
□ Roof debris and loose fasteners were removed
□ Final photos, warranties and product information were provided
□ Any remaining punch-list items were documented before final payment
GOOD TO KNOW
A finished roof can look clean from the ground while important details remain hidden. Photos taken during tear-off, deck repair, underlayment and flashing installation can provide useful documentation of work that will no longer be visible once the roof is complete.
Bottom Line
A quality roof installation depends on the entire process, not just the finished shingles, metal or tile.
The roof deck must provide a solid base, underlayment and flashing must manage water correctly, the finished roof covering must be installed according to the system requirements, and penetrations, ventilation and edges all need proper detailing. Installation should also follow the roofing manufacturer’s instructions and applicable local requirements.
Understanding the installation sequence helps homeowners follow the work, ask better questions and recognize why preparation and concealed details matter just as much as the roof surface they see when the job is finished.